
Build iOS from Source
Set Up Xcode & Build Your iOS App
Build iOS from Source
Set up Xcode and build your iOS app locally from the iOS source code downloaded from the App Studio.
Use this guide only if you want a local Xcode-based workflow. It is an advanced or optional path and not the standard Median self-serve publishing workflow.
For standard Median self-service publishing and use of TestFlight, you do not need to build your iOS app from source. Instead simply connect your Median organization and Apple Developer account using our App Store Connect API integration:
- Open your app in the Median App Studio and go to Build & Deploy.
- Click Configure in the iOS IPA section.
- In Apple Developer API Connection, enter your Issuer ID and Key ID, and upload your Private Key (.p8) file.
- In Bundle ID & App Store Connect App:
- Register the Bundle ID for your app.
- Create the App Store Connect app record in App Store Connect using that Bundle ID.
- Verify the App Store Connect app record in Median App Studio.
- In Signing & Upload Settings, select Distribution Profile and set Upload to App Store Connect to Automatic.
- Build your iOS IPA in the Median App Studio (if Automatic Upload is not selected you can manually click "Upload" after the build is complete).
- Wait for Apple to process the uploaded build in App Store Connect.
- In App Store Connect, open TestFlight, resolve any required prompts, and add testers.
- After testing submit the build for App Review.
Install Xcode
Before proceeding, you must first set up your local iOS development environment. This involves installing Xcode on a computer running macOS.
Xcode VersionUse the latest stable (non-beta) version of Xcode to ensure compatibility.
Once installed, proceed with the steps below to download and build your Median app.
Download iOS Source Code
Access your app’s private management page to download the iOS source code:
- Navigate to the Build & Deploy tab.
- In the iOS Source Code section, click Download (see Figure 1).
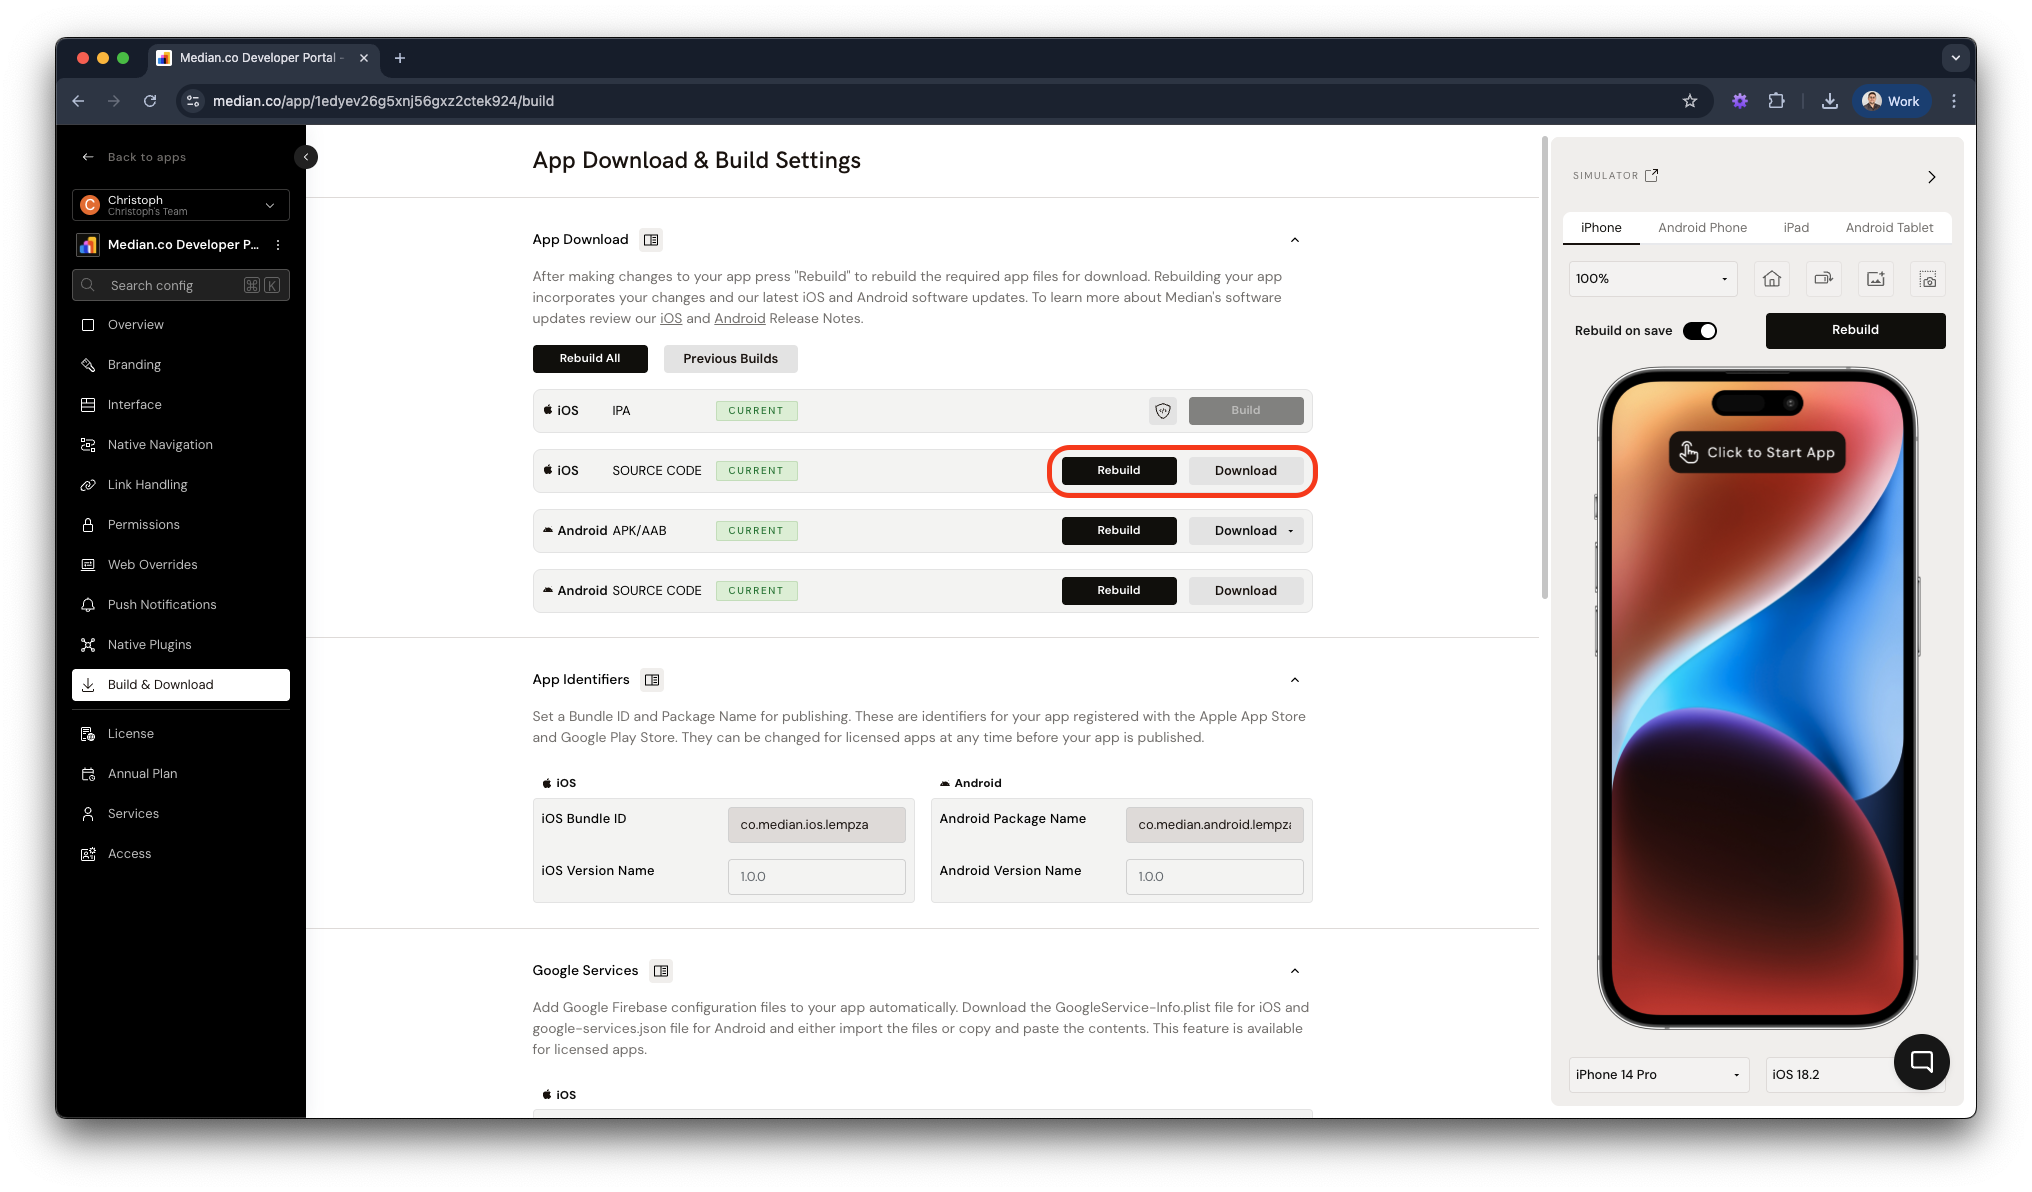
Figure 1 - Download iOS Source
Extract and Open the Source Code
After downloading, extract the ios_source.tar.gz file using one of the following methods:
Method 1: Using Finder
- Double-click
ios_source.tar.gzto extract it. - Open the extracted folder and double-click
<yourapp>.xcworkspace.
Method 2: Using Terminal
- Open Terminal and execute:
tar -xzvf ios_source.tar.gz
Please note that thetarcommand will extract the file to a subdirectory named “ios”. If there is an existing directory with the same name it will be overwritten. - Navigate to the extracted folder and open the workspace:
open <yourapp>.xcworkspace
Important: .xcworkspace not .xcodeprojAlways open
<yourapp>.xcworkspace, not<yourapp>.xcodeproj, as Median App Studio uses Cocoapods for dependency management.
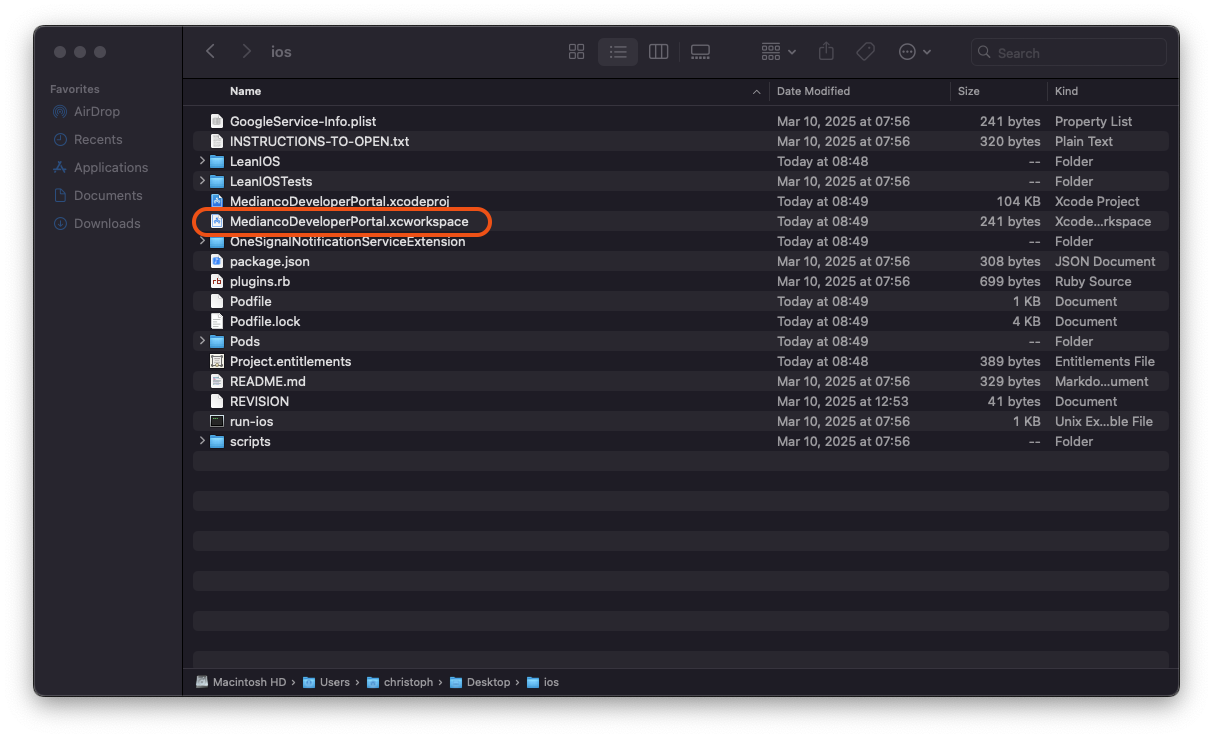
Figure 2 - Open the .xcworkspace file
Build and Run the App in the Simulator
- In Xcode, select a simulator or connected device from the dropdown menu.
- Click the "Run" play button.
- Xcode will compile and launch the app in the chosen simulator or device.
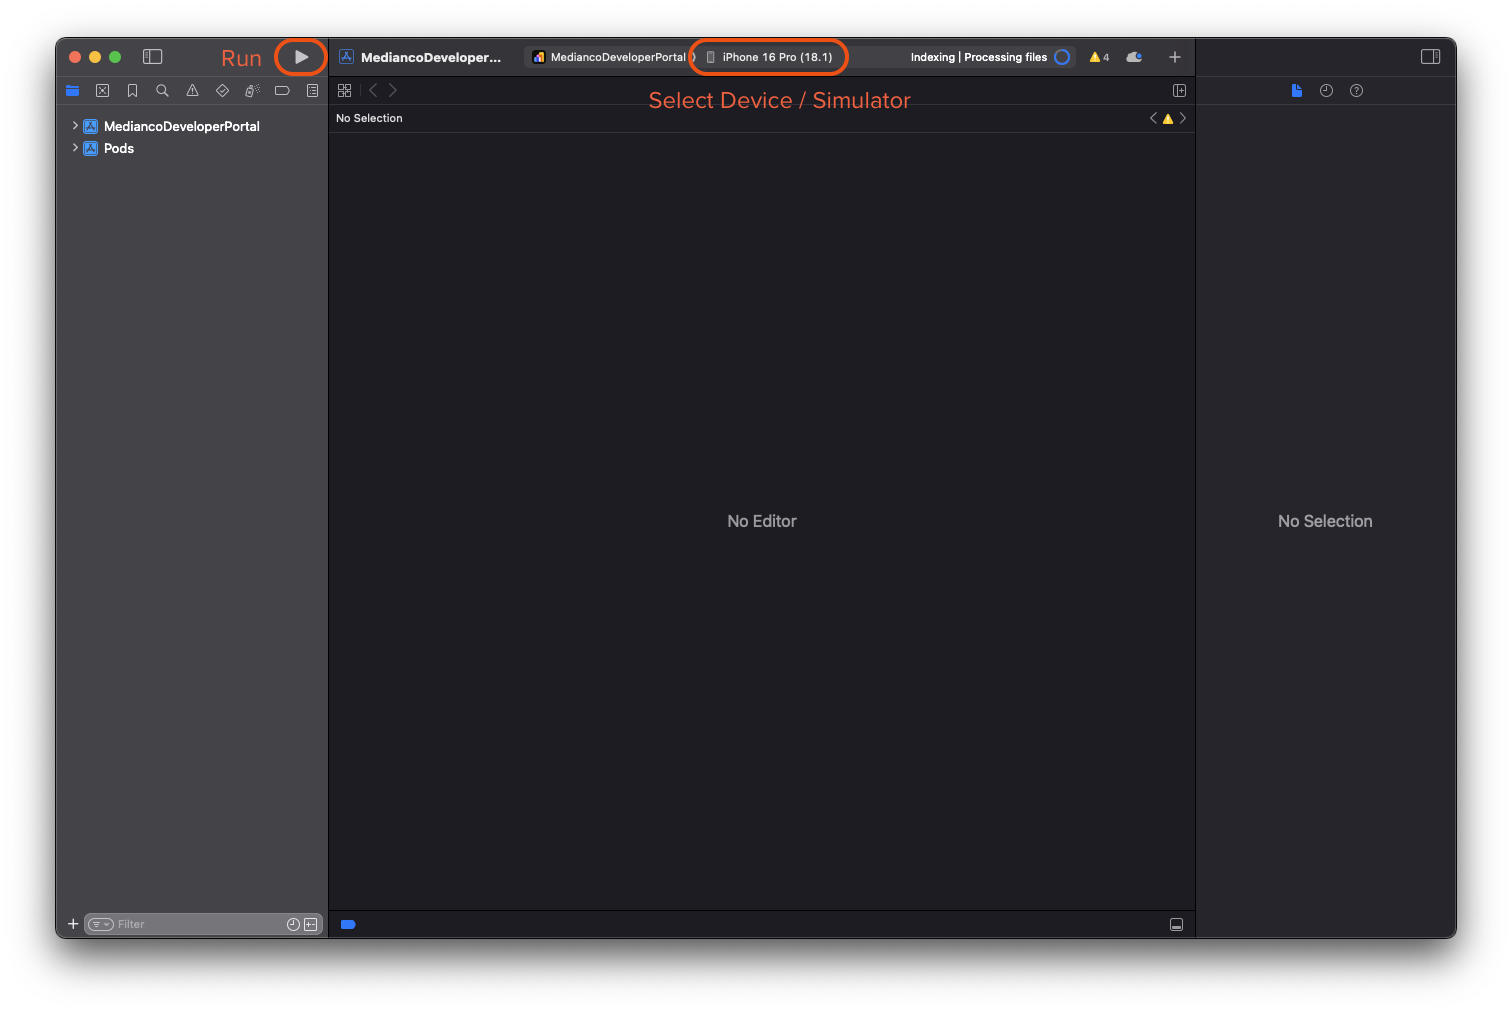
Figure 3 - Run App in the Simulator
Cocoapods Dependency Management
Median automatically installs all required dependencies when you download the source code. You do not need to run pod install manually. If you need to install additional pods not supplied by Median please contact our team for assistance.
Missing FilesIf you encounter missing file errors, clean your build folder and derived data: https://stackoverflow.com/questions/38016143/how-can-i-delete-derived-data-in-xcode-8
Adding Capabilities (e.g., Push Notifications)
Certain features, such as push notifications, require manually enabling capabilities in Xcode:
How to Enable Push Notifications in Xcode
- Open Xcode and select your app in the left panel.
- Navigate to "Signing & Capabilities" in the right panel.
- Click the "+ Capability" button.
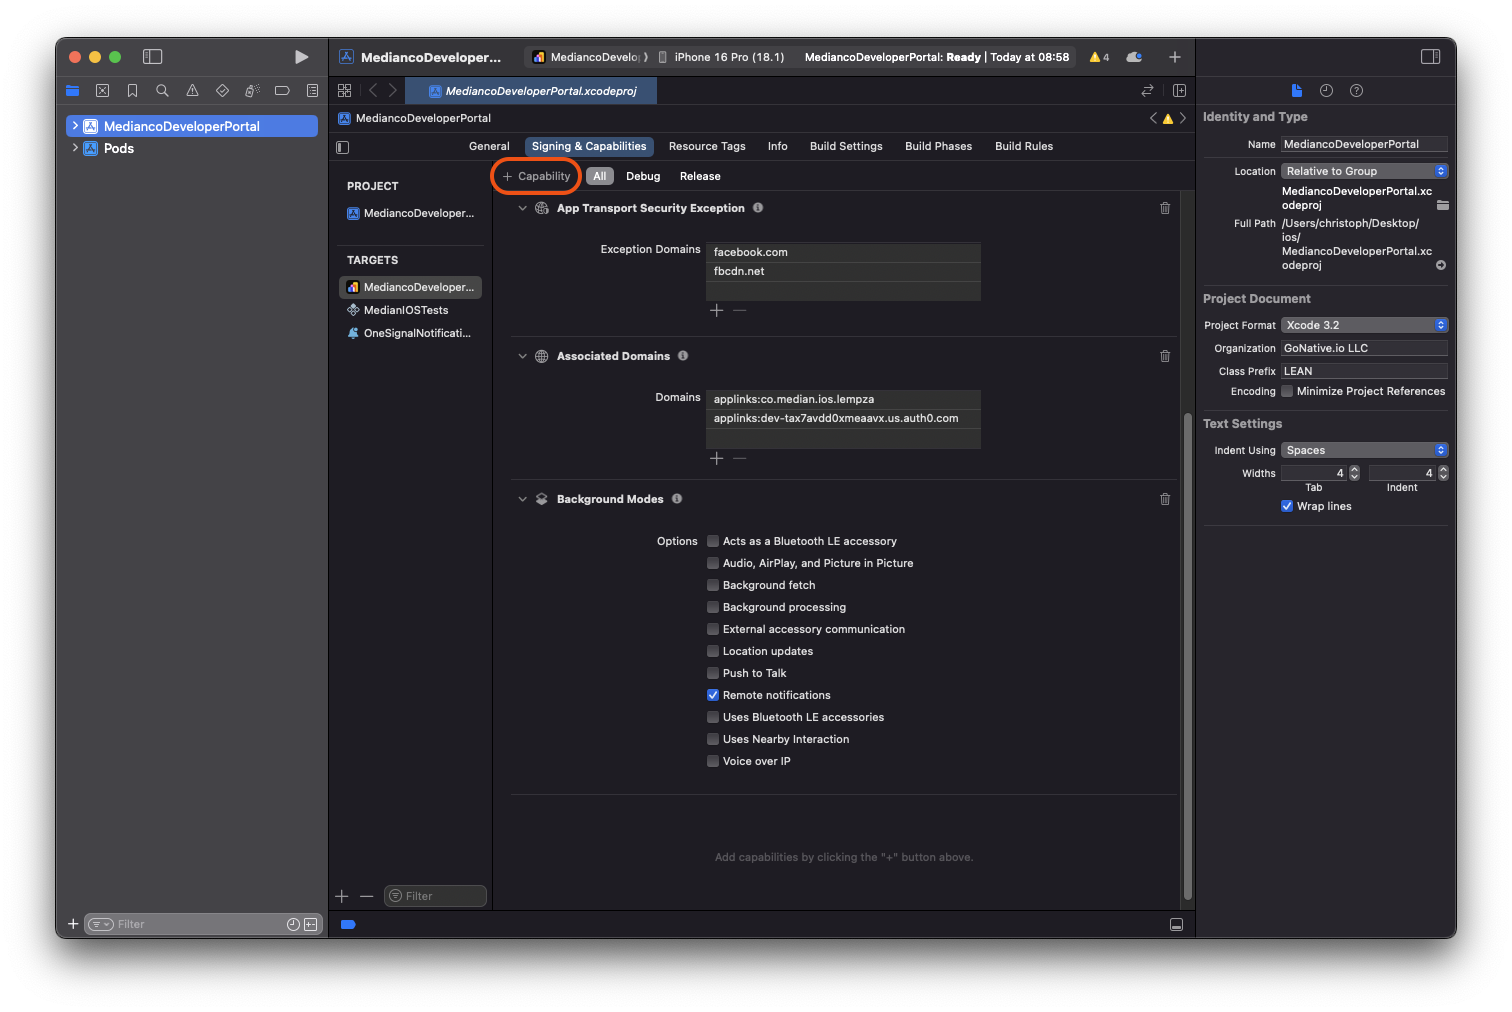
Figure 4 - Adding Capabilities
- Search for and select "Push Notifications."
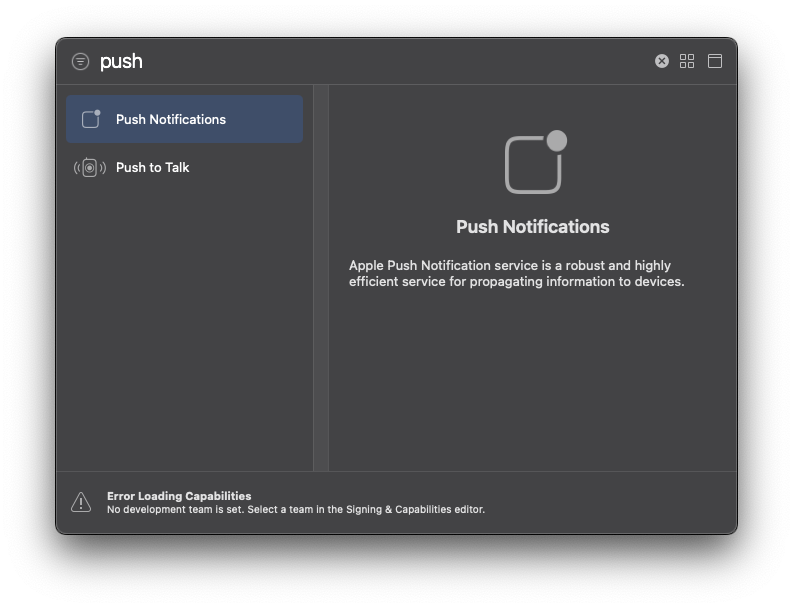
Figure 5 - Search for Push Notifications Capability
- The capability will appear under "Signing & Capabilities."
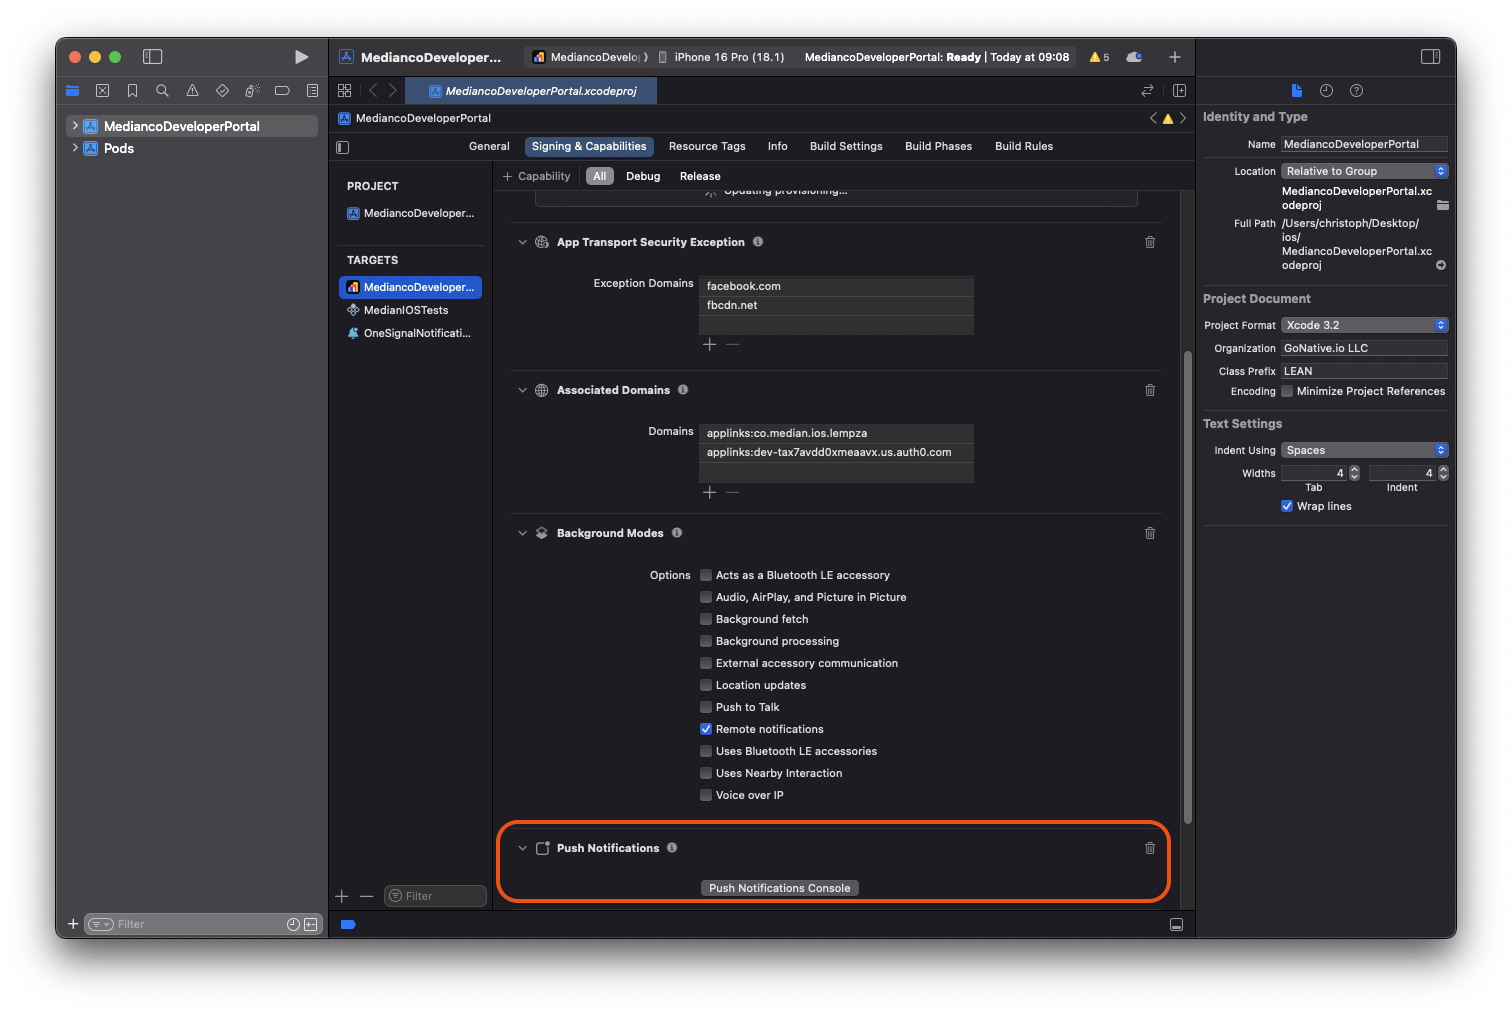
Figure 6 - Confirm that a Capability has been added
Plugin Capability Matrix
Some plugins require specific capabilities or entitlements. These are automatically added when building your app in App Studio but may need to be added manually if you build from downloaded source code.
| Plugin | Required Capabilities / Entitlements |
|---|---|
| All Push Notification Plugins | Push Notifications |
| AgeSafety | Age Range |
| Health Bridge | Health Kit |
| Intent Edge | Wi-Fi, Push Notifications |
| In-App Purchases | In-app Purchases |
| Reader Modal | External Link Account |
| Revenue Cat | In-app Purchases |
| Share Plugin | App Groups |
Frequently Asked Questions
How do I fix the ITMS-90078: Missing Push Notification Entitlement error when submitting my app to App Store Connect?
How do I fix the ITMS-90078: Missing Push Notification Entitlement error when submitting my app to App Store Connect?
This warning indicates that your code includes methods for registering a push token, suggesting that the app intends to use push notifications. However, since the required entitlement is missing, push notification functionality will not work.
If your app does not use push notifications, you can safely ignore this warning.
Can I turn off iPad support?
Can I turn off iPad support?
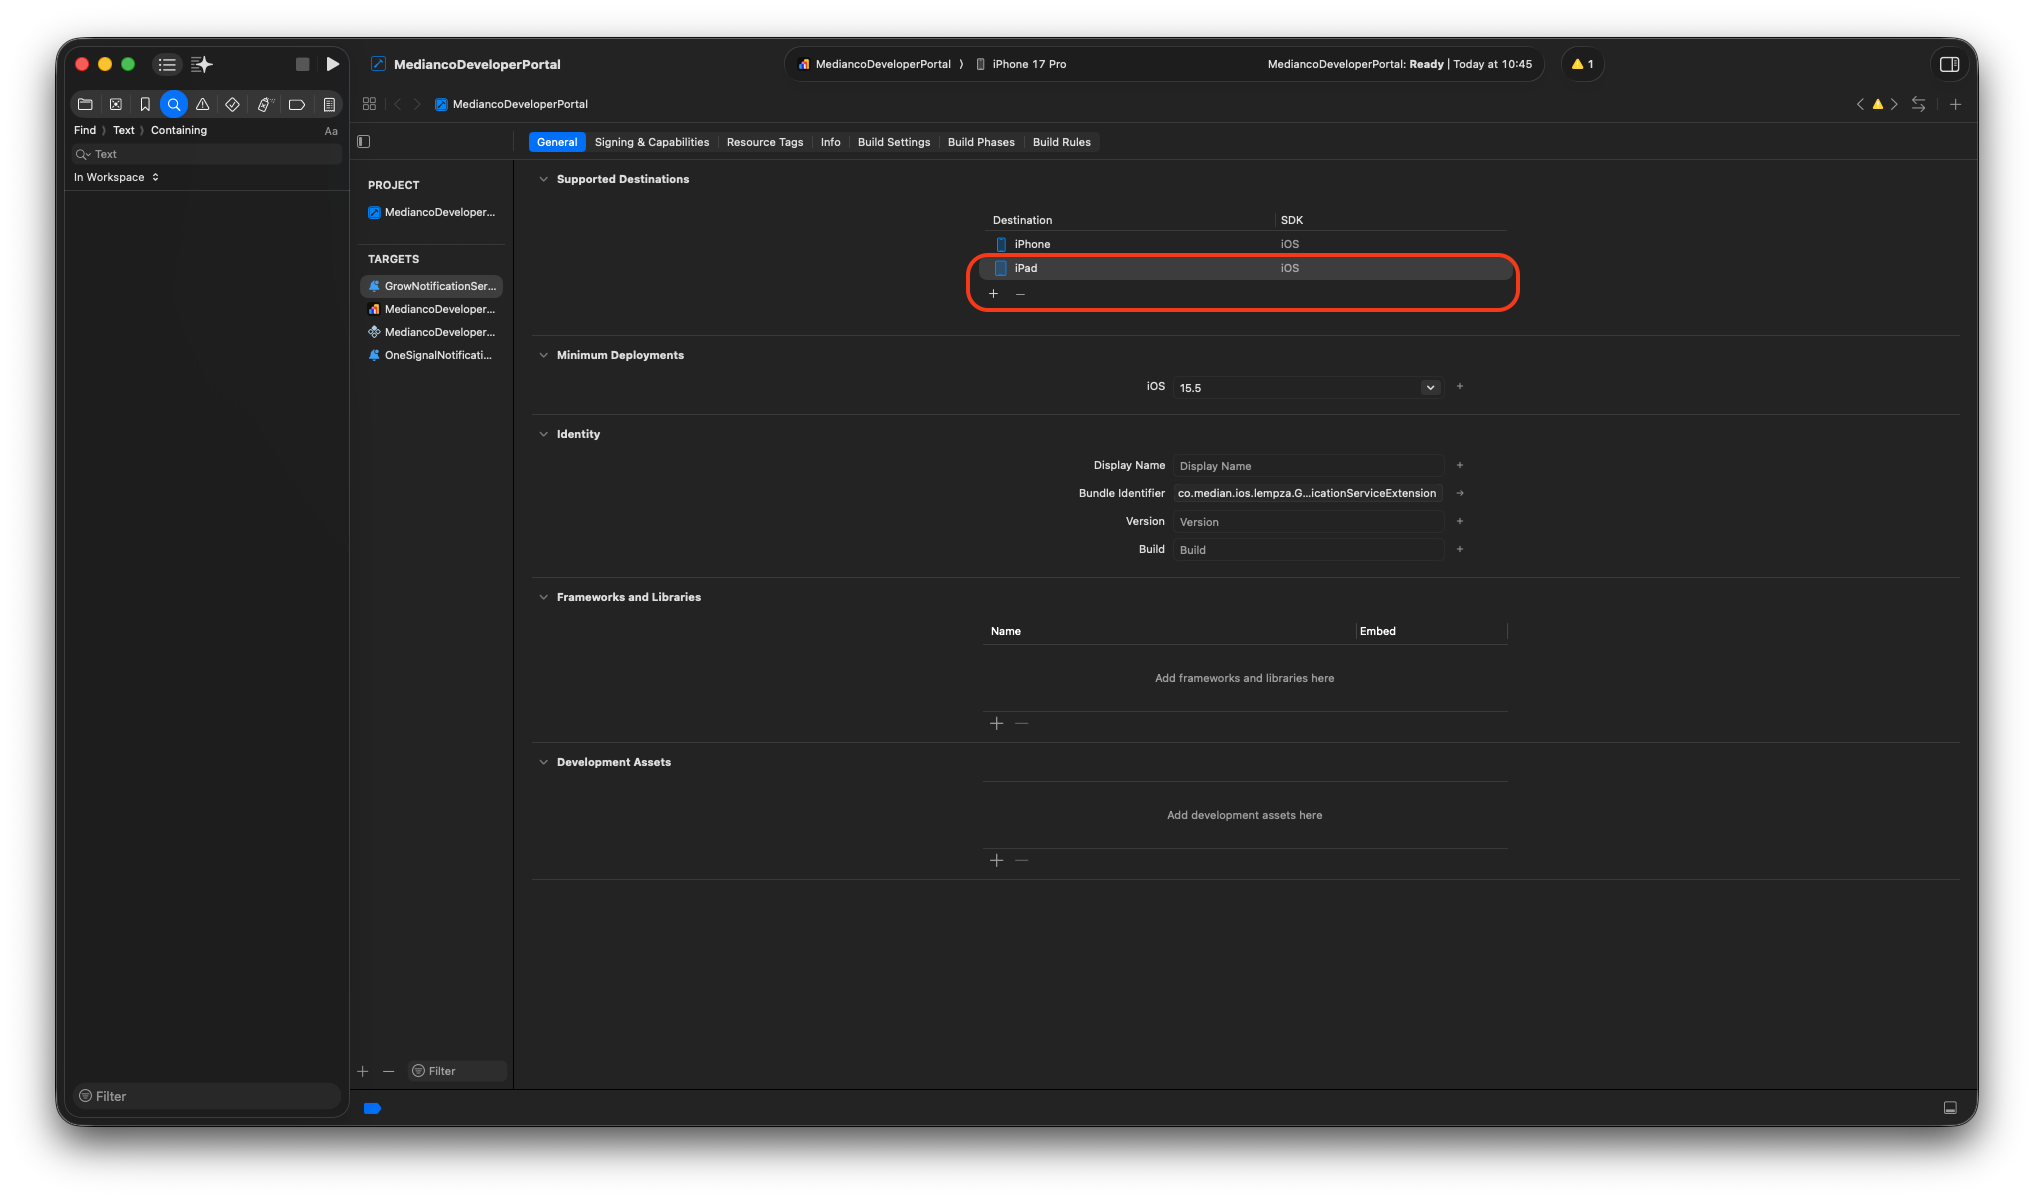
Yes. Please note that iPhone only apps will run on an iPad in a phone-sized view. It is worth putting in some effort to make your app work on iPads in that mode even if you don't want to support iPads natively.
To disable iPad support you can exclude iPad as a destination in Xcode as shown in the image below.
Updated about 1 month ago