
Customize Push Notifications
Customize the Icon, Badges and Sound of your app's Push Notifications
Notification icons
The icon displayed with a push notification is configured differently on each platform.
| Platform | Behavior |
|---|---|
| iOS | Automatically uses your app's primary icon; per-notification icon customization isn't supported by Apple |
| Android | Requires a custom monochromatic icon with a transparent background, configured in App Studio |
Android icon requirements
Android's notification system renders icons differently than the app launcher icon. For correct display across all devices, your notification icon must be:
- Monochromatic, a single color only; no gradients, no full-color artwork
- Transparent background; the system colorizes the icon based on the device's accent color
ImportantNotification icons on Android are compiled directly into the native app code during the build process. Submitting an icon that doesn't meet these specs, such as a full-color logo, will cause rendering issues on some devices, typically appearing as a solid white or colored square. Configure the correct icon in App Studio before building.
To set your Android notification icon, go to App Studio > Native Plugins > OneSignal and upload your icon file.
📖 Learn more in the OneSignal Notification Sounds and Android notification categories.
Notification sounds
Custom sounds help users quickly identify your app's notifications, particularly useful for alerts that require immediate attention, like messages or time-sensitive events.
Step 1: Upload your sound files
Upload your audio files in App Studio under Native Plugins > OneSignal > Settings. Files are automatically named in the order they're uploaded:
- First file →
custom_sound_1 - Second file →
custom_sound_2
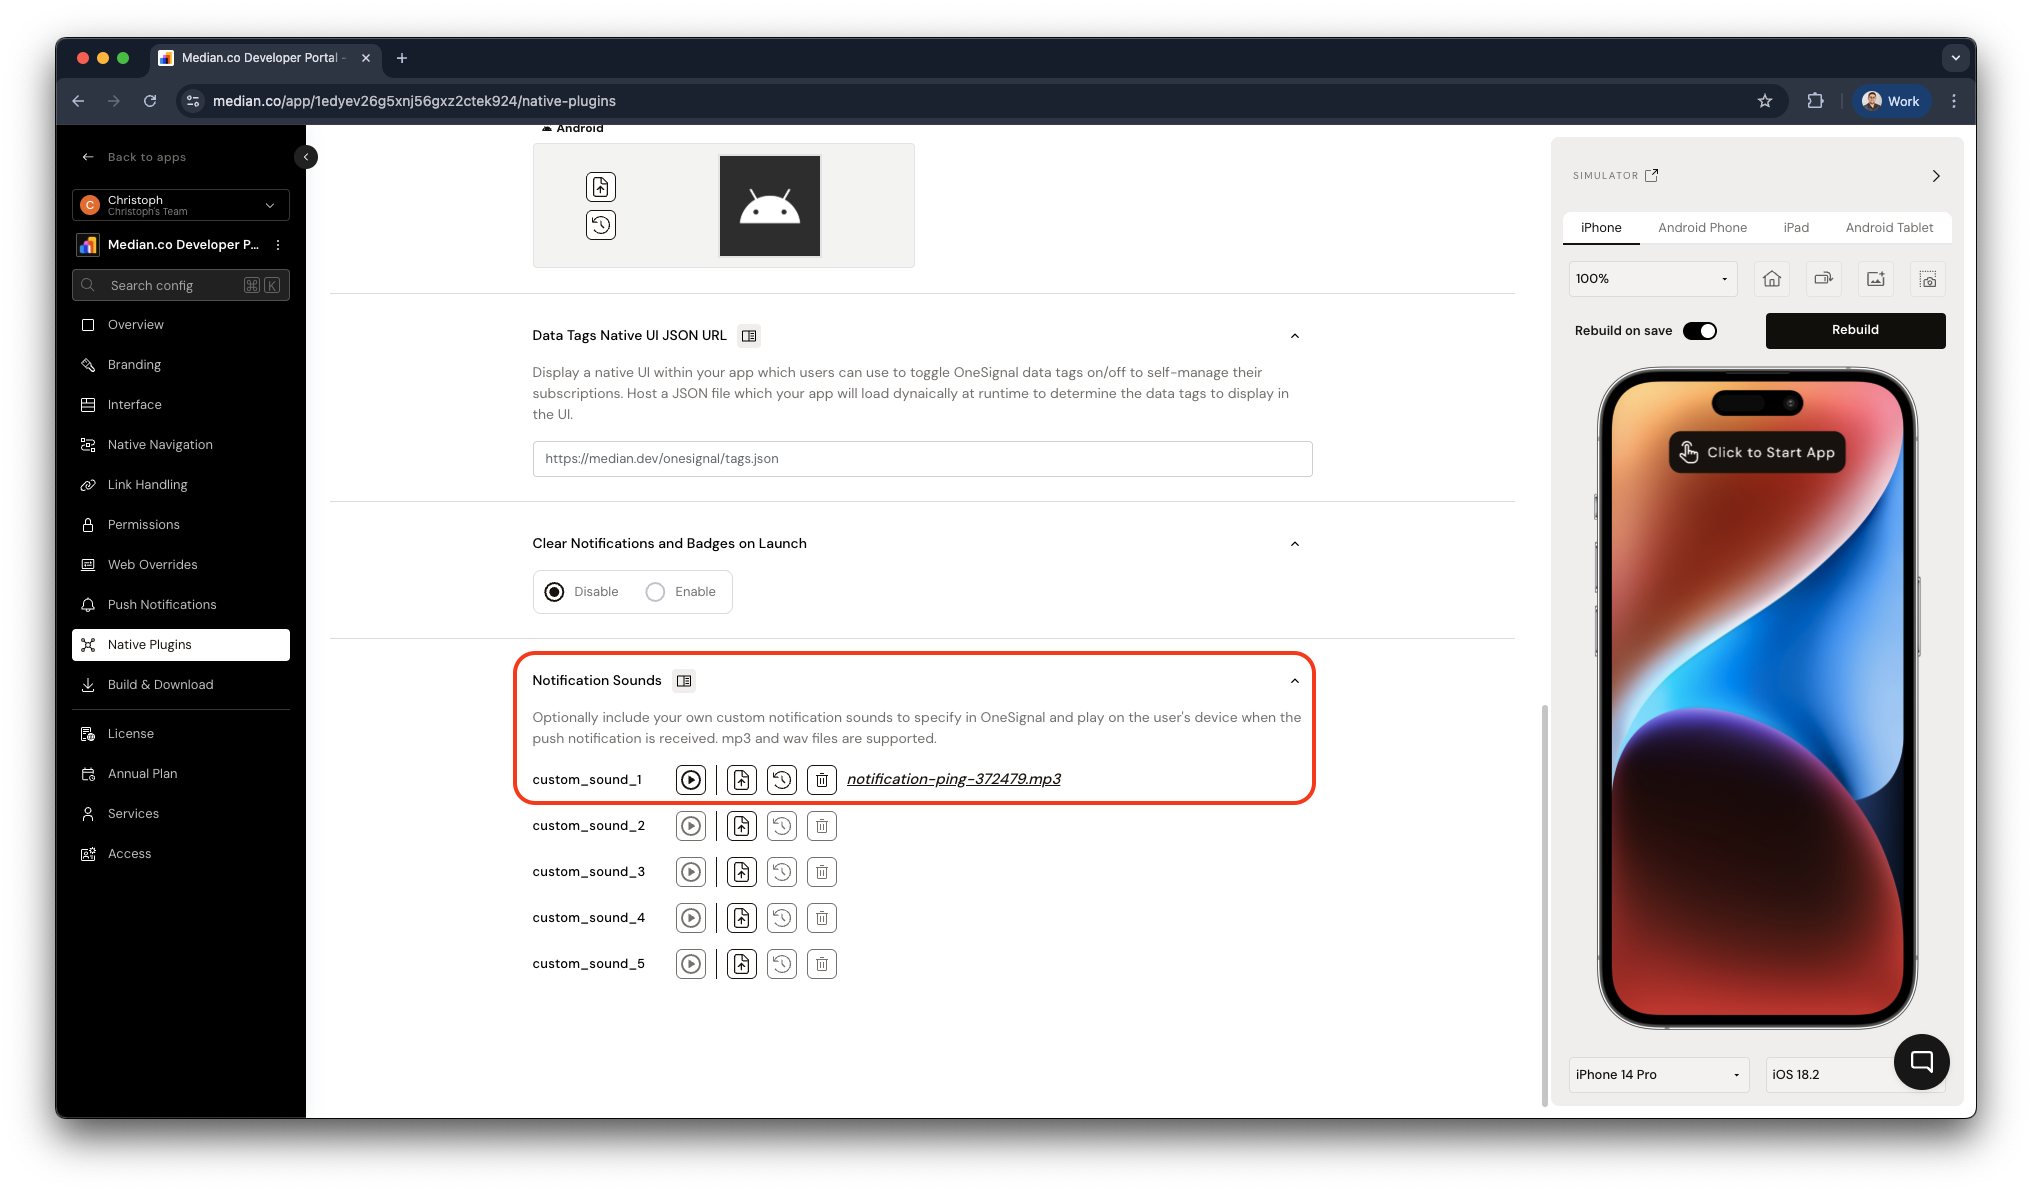
App Studio - Upload custom Notification Sounds
Median handles format conversion automatically; you don't need to prepare separate files per platform.
Platform format reference
| Platform | Stored format | How to reference in API |
|---|---|---|
| iOS | .caf | Include the extension: custom_sound_1.caf |
| Android | .mp3 | No extension needed: custom_sound_1 |
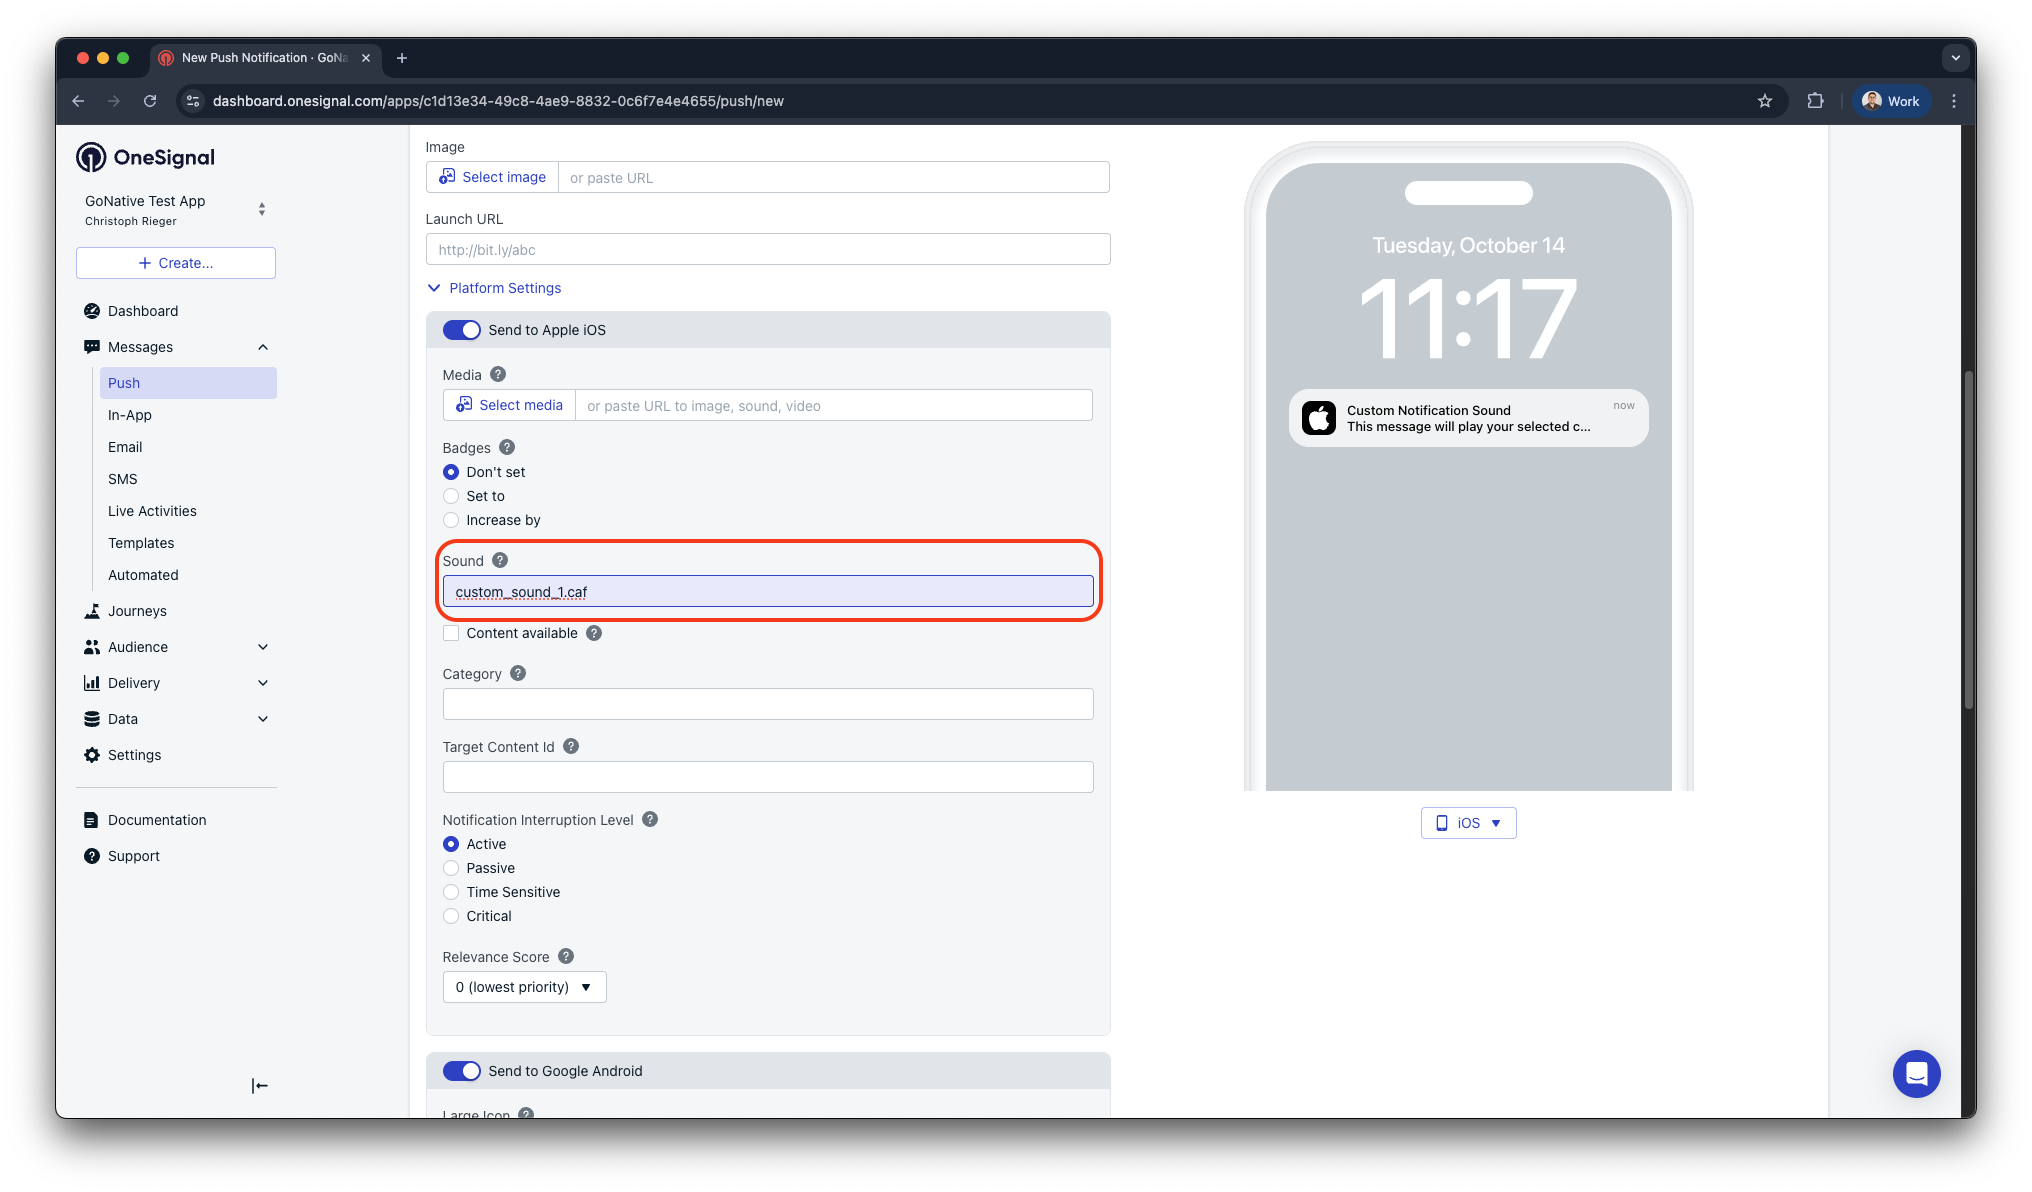
Step 2: Attach a sound to a notification
From the OneSignal dashboard: When composing a notification, look for the Sound option in the notification settings and select your uploaded sound.
From the REST API:
{
  "app_id": "{{YOUR_ONESIGNAL_APP_ID}}",
  "target_channel": "push",
  "contents": { "en": "You have a new message." },
  "ios_sound": "custom_sound_1.caf",
  "android_channel_id": "{{YOUR_ANDROID_CHANNEL_ID}}"
}
Androide noteCustom sounds on Android are tied to notification channels (also called categories). You must create a notification channel with your desired sound configured before it can be used. See OneSignal's Android notification categories guide for setup steps. Once a channel is created, use its ID as the
android_channel_idvalue.
Notification badges
Badge counts are the small number overlays that appear on your app icon, a quick way to tell users they have unread items waiting.
| Platform | Support |
|---|---|
| iOS | Natively supported on all devices |
| Android | Depends on device manufacturer (OEM); not universally available |
Setting and clearing badge counts
Use the Median JavaScript Bridge to set or clear badge counts from your web app:
// Set the badge count to a specific number
median.onesignal.badgeCount.set(5);

// Clear the badge count
median.onesignal.badgeCount.set(0);
Legacy pluginLegacy plugin: Badge count management is not available if your app uses the legacy OneSignal plugin (iOS v3 SDK / Android v4 SDK). See Legacy Mode for details.
iOS App Groups configuration (required for badge reset)
For OneSignal to automatically reset badge counts when a user opens a notification, App Groups must be configured for both your main app target and the OneSignal notification service extension.
For App Studio builds using Median iOS signing, confirm your build includes the OneSignal Notification Service Extension provisioning profile. If you manually manage Apple identifiers/provisioning profiles or build from downloaded source, configure App Groups in Xcode:
Main App Target:
- In Xcode, select your main app target.
- Go to Signing & Capabilities > + Capability.
- Add App Groups.
- Create a group with the identifier:
group.YOUR_BUNDLE_IDENTIFIER.onesignal.
OneSignalNotificationServiceExtension Target:
- Select the extension target in Xcode.
- Repeat the same steps and use the same App Group identifier.
Replace YOUR_BUNDLE_IDENTIFIER with your actual bundle ID (e.g., com.yourcompany.yourapp).
For step-by-step instructions with screenshots, see OneSignal's iOS setup guide, App Groups.
Already completed App Groups during initial setup?If you followed the Get started with OneSignal guide and added App Groups during setup, you don't need to repeat these steps; you're already configured.