
Getting Started with Salesforce Experience Cloud
Step-by-step guide to connecting a Salesforce Experience Cloud site to Median.co
This guide walks through the first three steps required to connect a Salesforce Experience Cloud site to the Median native app shell. By the end, your Experience Cloud URL will be loaded inside a Median app with the JavaScript bridge unblocked and accessible to Lightning Web Components.
This is part one of a four-part series:
- Getting Started with Salesforce Experience Cloud (this page)
- Lightning Web Components and the JavaScript Bridge
- Deep Linking for Salesforce Experience Cloud
- Salesforce LWC Component Deployment and Reference
Prerequisites
Before starting, confirm the following:
- You have a Salesforce org with Experience Cloud enabled and at least one published Experience Cloud site.
- You have System Administrator access or equivalent permissions in the Salesforce org.
- You have a Median account. If not, create one here.
- (Optional) You have the Salesforce CLI installed for LWC component deployment. Installation instructions are at developer.salesforce.com/tools/salesforcecli.
Step 1: Retrieve Your Experience Cloud Site URL
Your Experience Cloud site URL is the starting URL Median uses to load your app.
- In Salesforce Setup, navigate to Digital Experiences > All Sites.
- Click Builder next to your site.
- Copy the URL from the browser address bar, removing
/sor any trailing path. The URL should be in the formathttps://yourorg.my.site.com/sitename.
For production apps, use your custom domain rather than the Salesforce-generated.my.site.comdomain. This is required for deep linking to work correctly, and it produces a cleaner experience for end users.
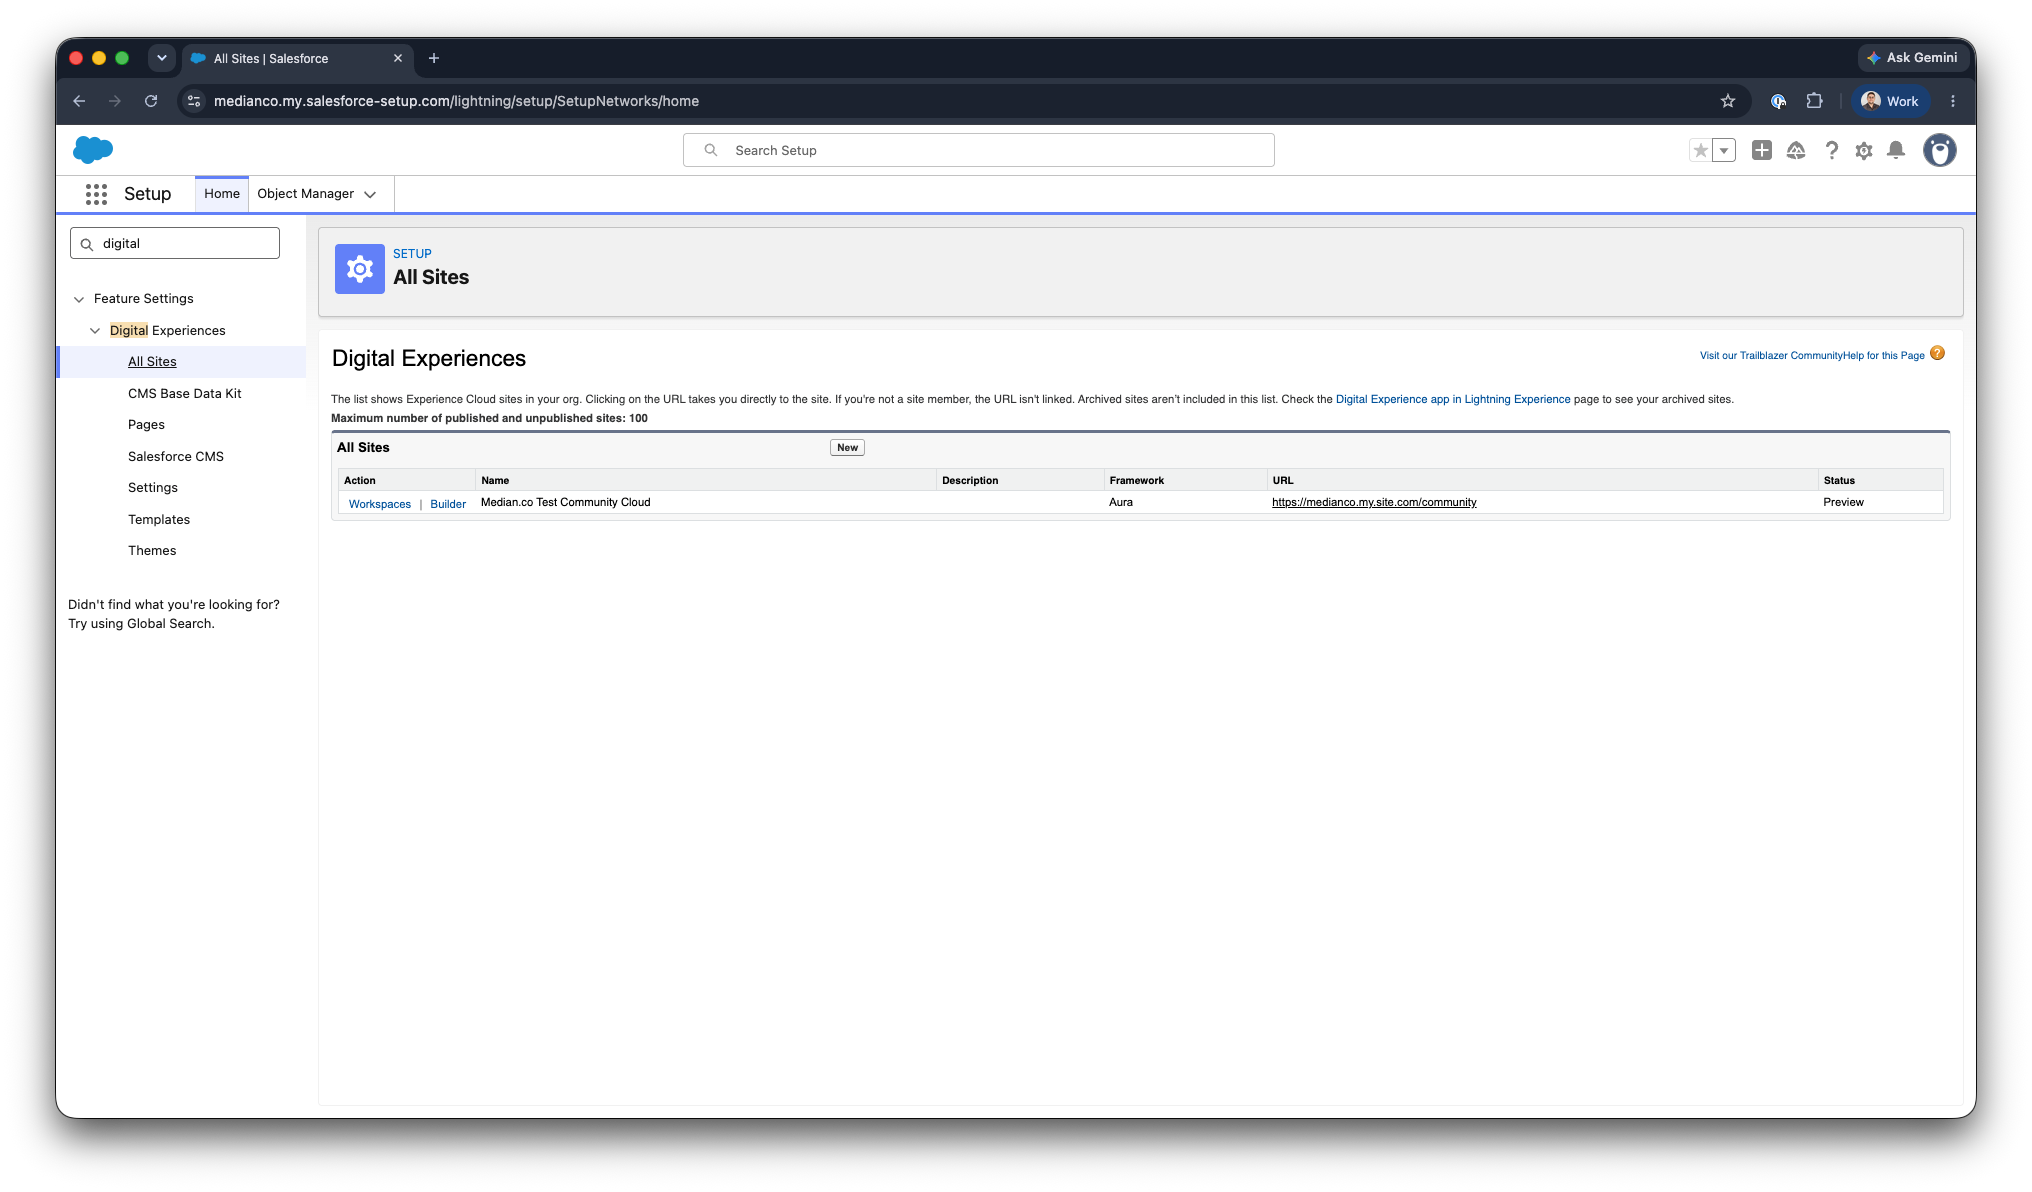
Salesforce - Digital Experiences
Step 2: Create Your App in Median App Studio
- Log in to Median App Studio and create a new app.
- Paste your Experience Cloud site URL as the starting URL.
- Complete the basic branding configuration: app name, icon, and splash screen.
- Save the configuration. You do not need to publish the app yet.
Step 3: Configure Content Security Policy in Experience Builder
Salesforce Experience Cloud enforces a Content Security Policy (CSP) to prevent Cross-Site Scripting (XSS) attacks. By default, this policy blocks JavaScript that originates from outside the Salesforce domain, which includes the Median JavaScript bridge (window.median).
If the CSP is set to Strict, the window.median object will be unavailable inside your LWC components, and all native features including push notifications, biometric authentication, and barcode scanning will be non-functional.
To configure CSP:
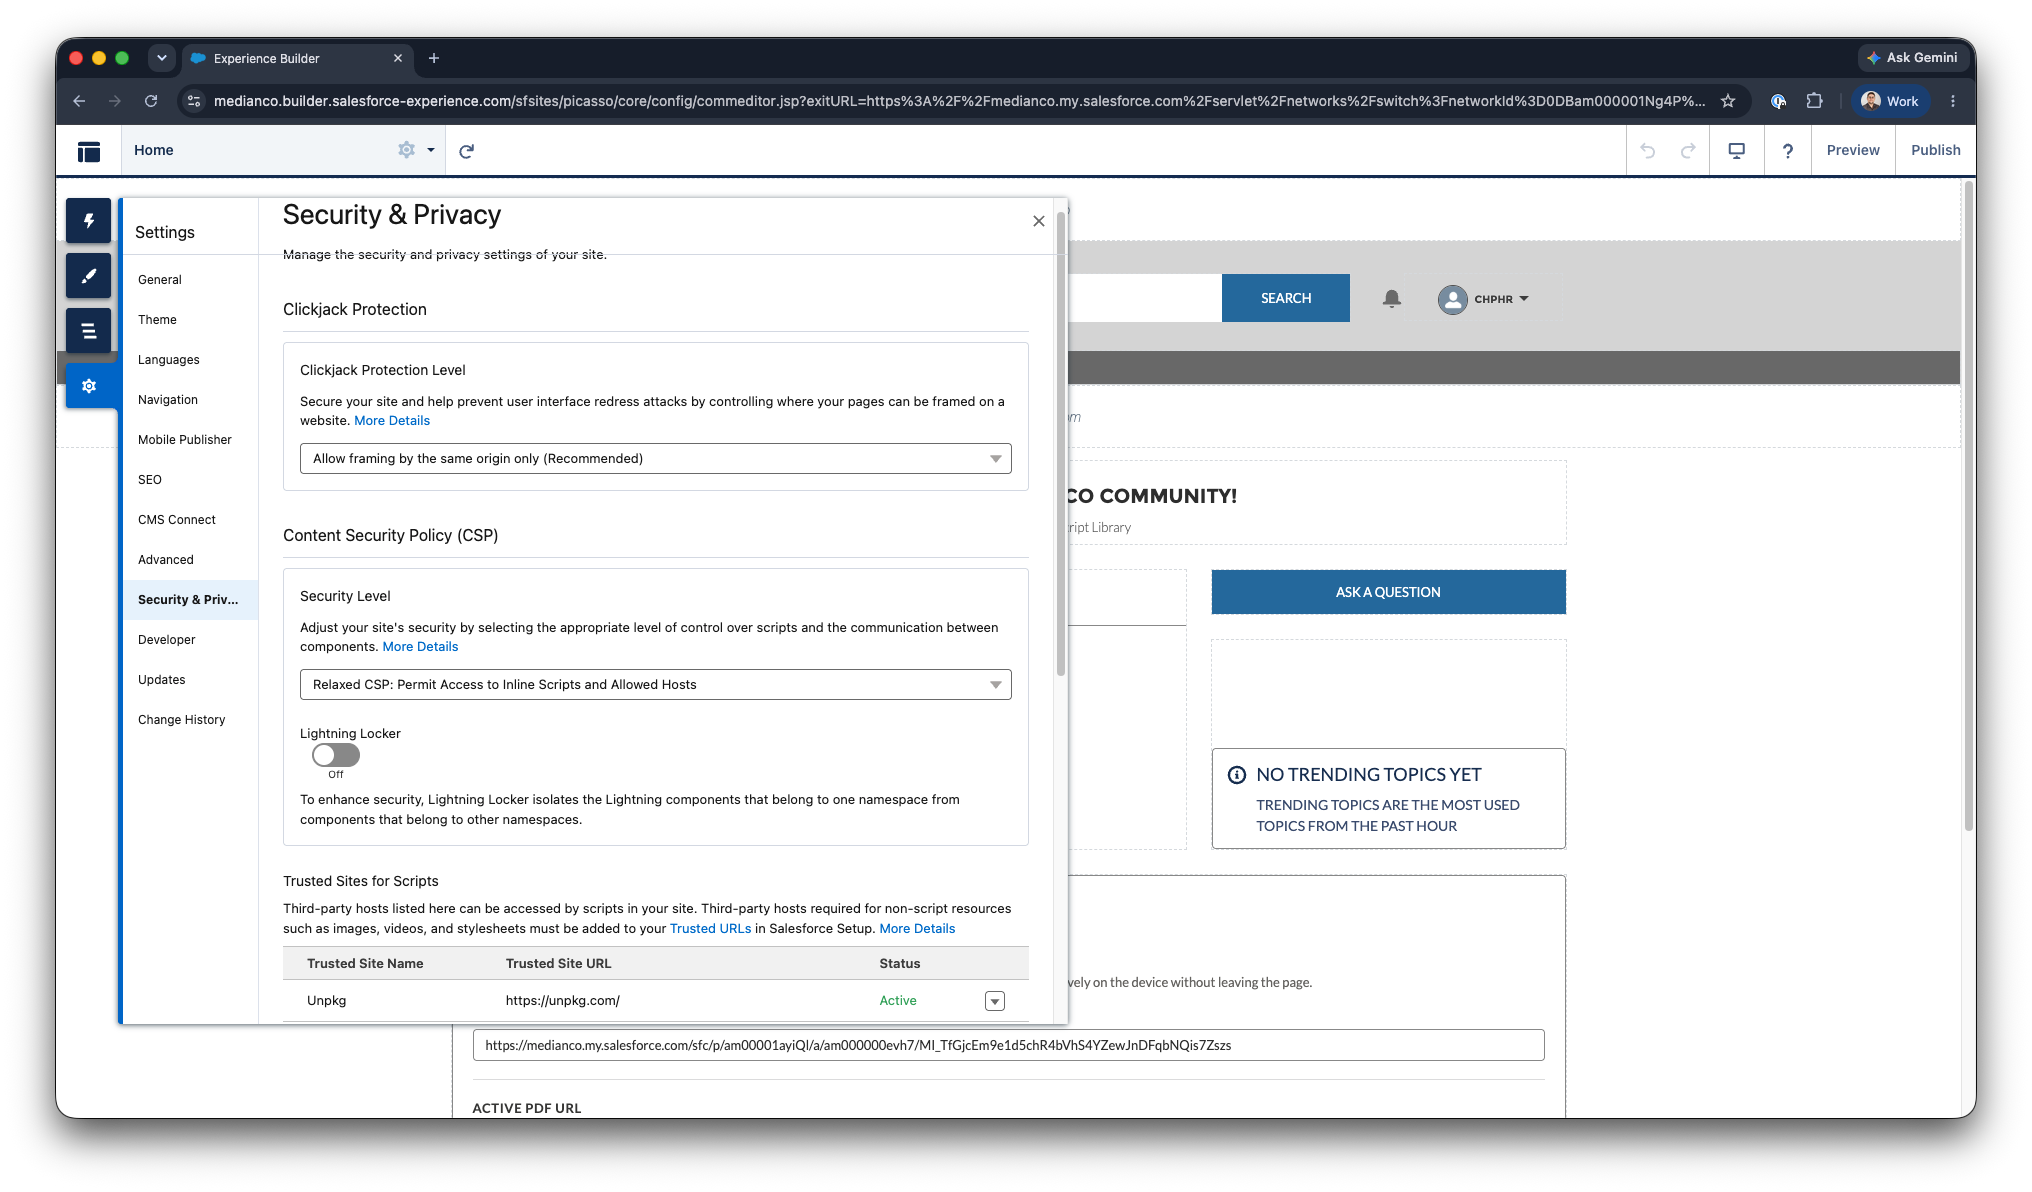
- In Experience Builder, go to Settings > Security and Privacy.
- Set Security Level to Relaxed CSP: Permit Access to Inline Scripts and Allowed Hosts.
- Under Trusted Sites for Scripts, add the Median bridge distribution URLs. You can either self-host the NPM library or use a content distribution network like UNPKG to access the latest version of the Median JavaScript Bridge.
Why Relaxed CSP is safe in this context:
Relaxed CSP does not disable security broadly. It allows inline scripts and approved external origins. Median injects its bridge via the native WebView layer rather than an external script tag, so this setting is primarily required to prevent the browser security model from blocking bridge calls that originate from the native layer rather than from a trusted web host.
For organizations with strict change management processes, this CSP change should be reviewed by your security team and documented as part of your mobile app architecture decision record.
Updated 3 months ago