
Configure Signing for Your App
Prepare Median Apps for iOS Deployment
With your App Store Connect integration set up, the next step is to enable signing for each app in your Median organization. This ensures the app is built with the correct credentials for App Store Connect upload, TestFlight testing, App Store submission, or direct installation on registered devices.
All iOS signing configuration lives in one place: the iOS IPA Build Configuration panel in Median App Studio. This article walks through each section of that panel, in order.
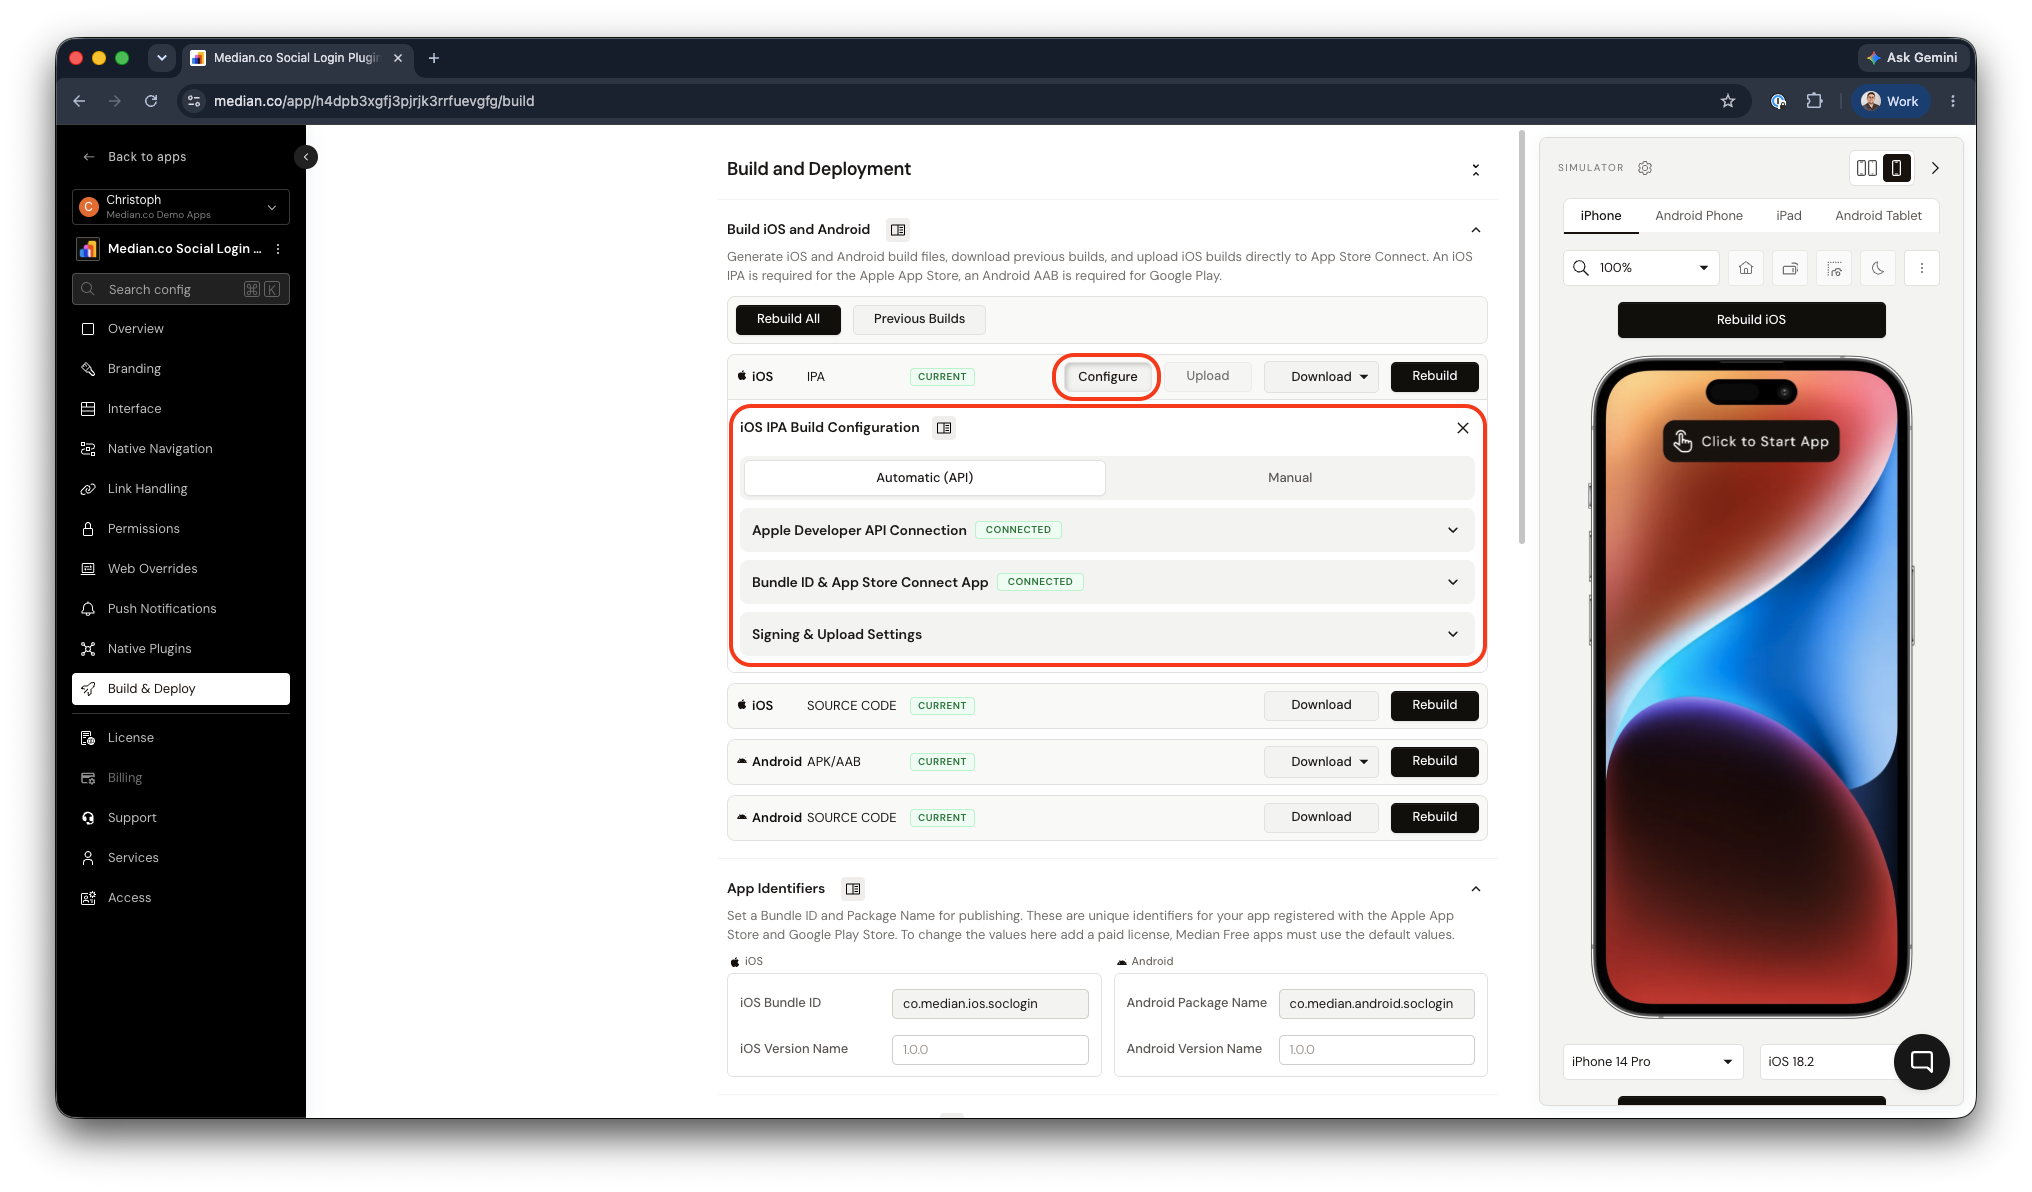
App Studio - iOS IPA Build Configuration panel
The panel has a top-level Automatic (API) / Manual toggle. Automatic (API) is the recommended path for most apps and is covered first below; Manual is covered in Option 2.
Option 1 - Automatic Provisioning
Section 1: Apple Developer API Connection
If you completed Connecting Median with App Store Connect, this section already shows a Connected badge along with your Issuer ID, Key ID, and private key filename. If not, complete that article before continuing.
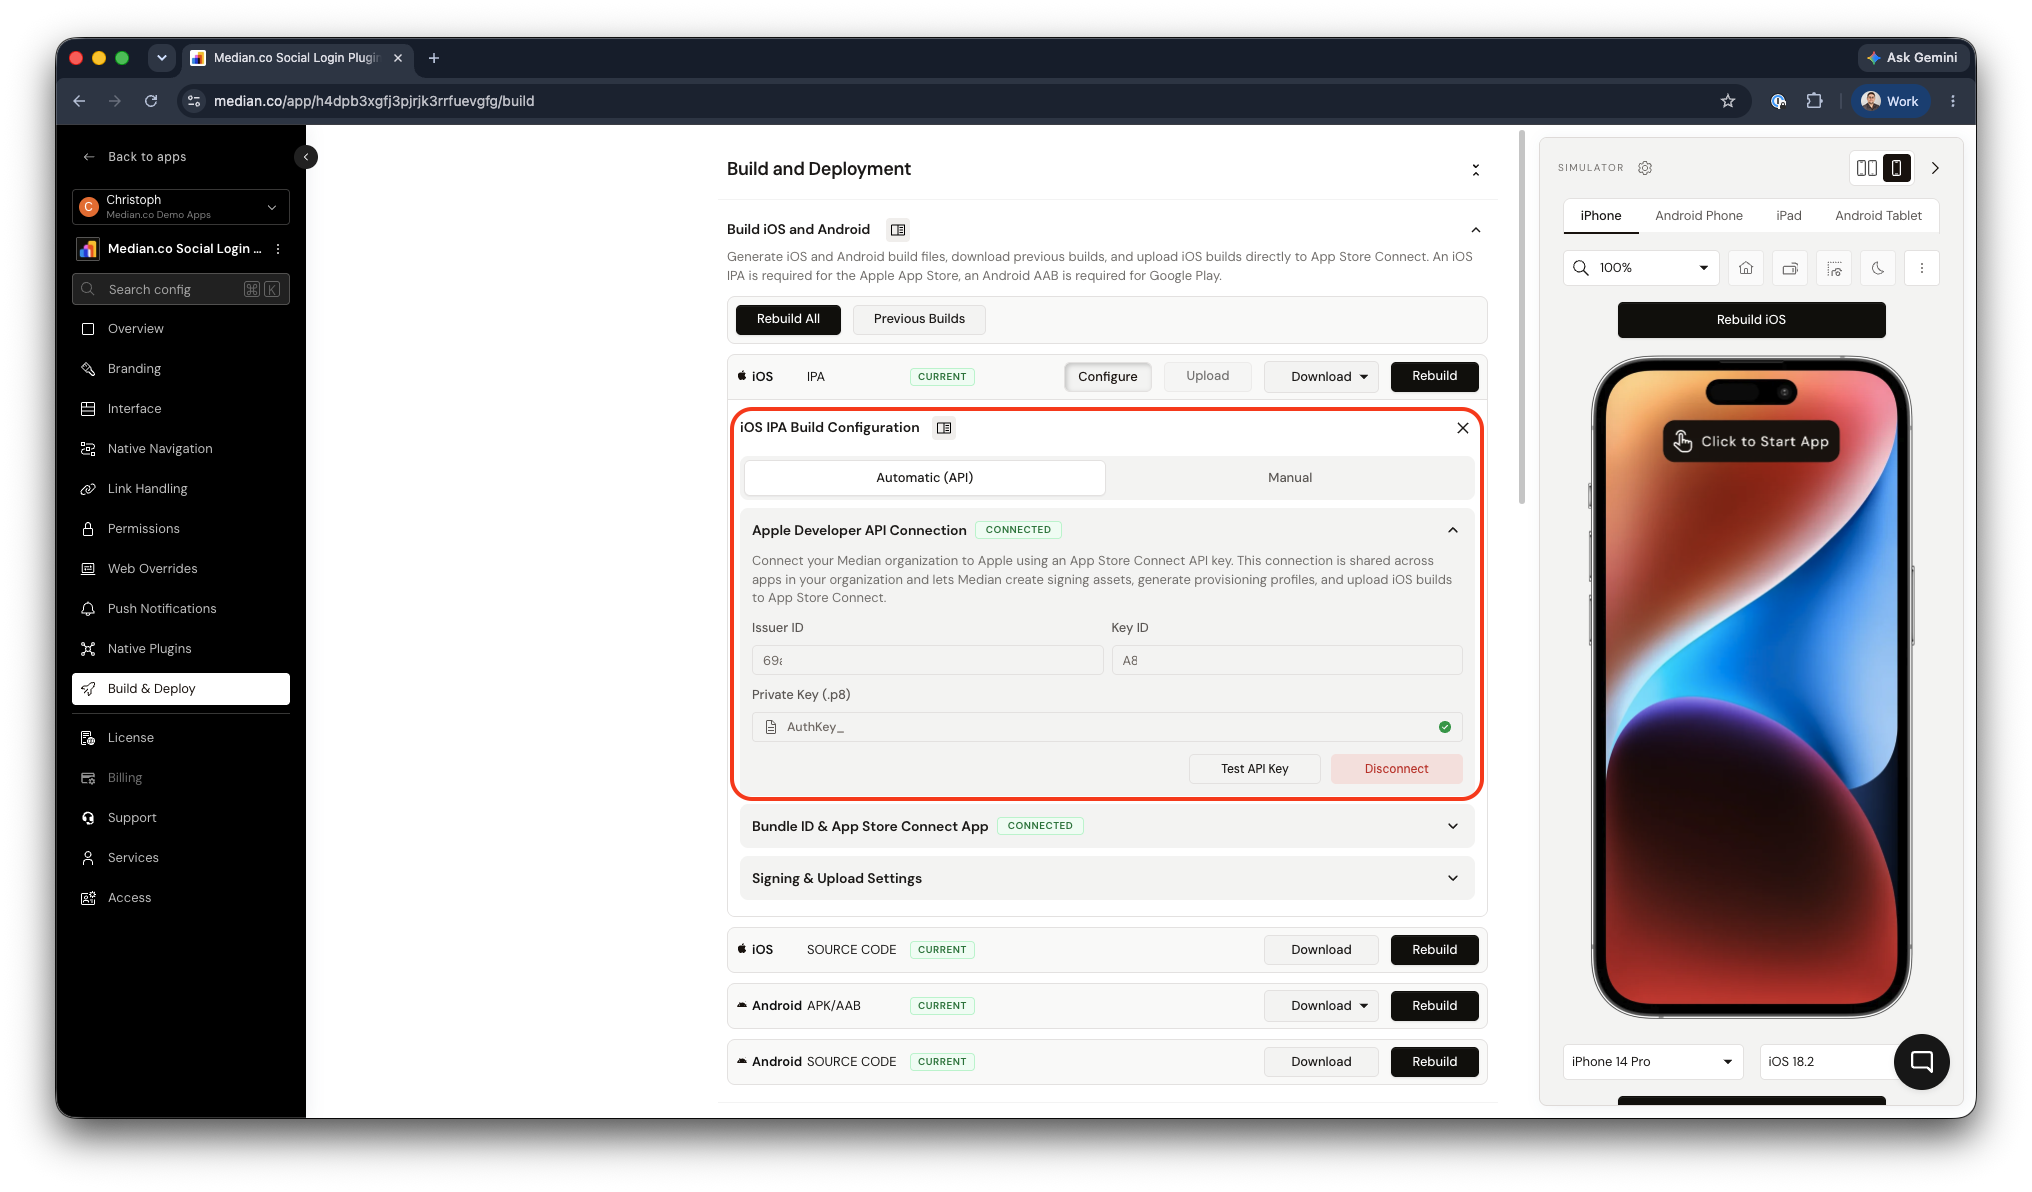
Apple Developer API Connection Section
Section 2: Bundle ID & App Store Connect App
This section ensures your app's Bundle ID is registered with Apple and that a matching app record exists in App Store Connect. Both are required before Median can generate a provisioning profile.
The Bundle ID your app requires (generated from your Median app) is shown at the top of this section. You can also learn more about the Bundle ID in our App Identifiers article.
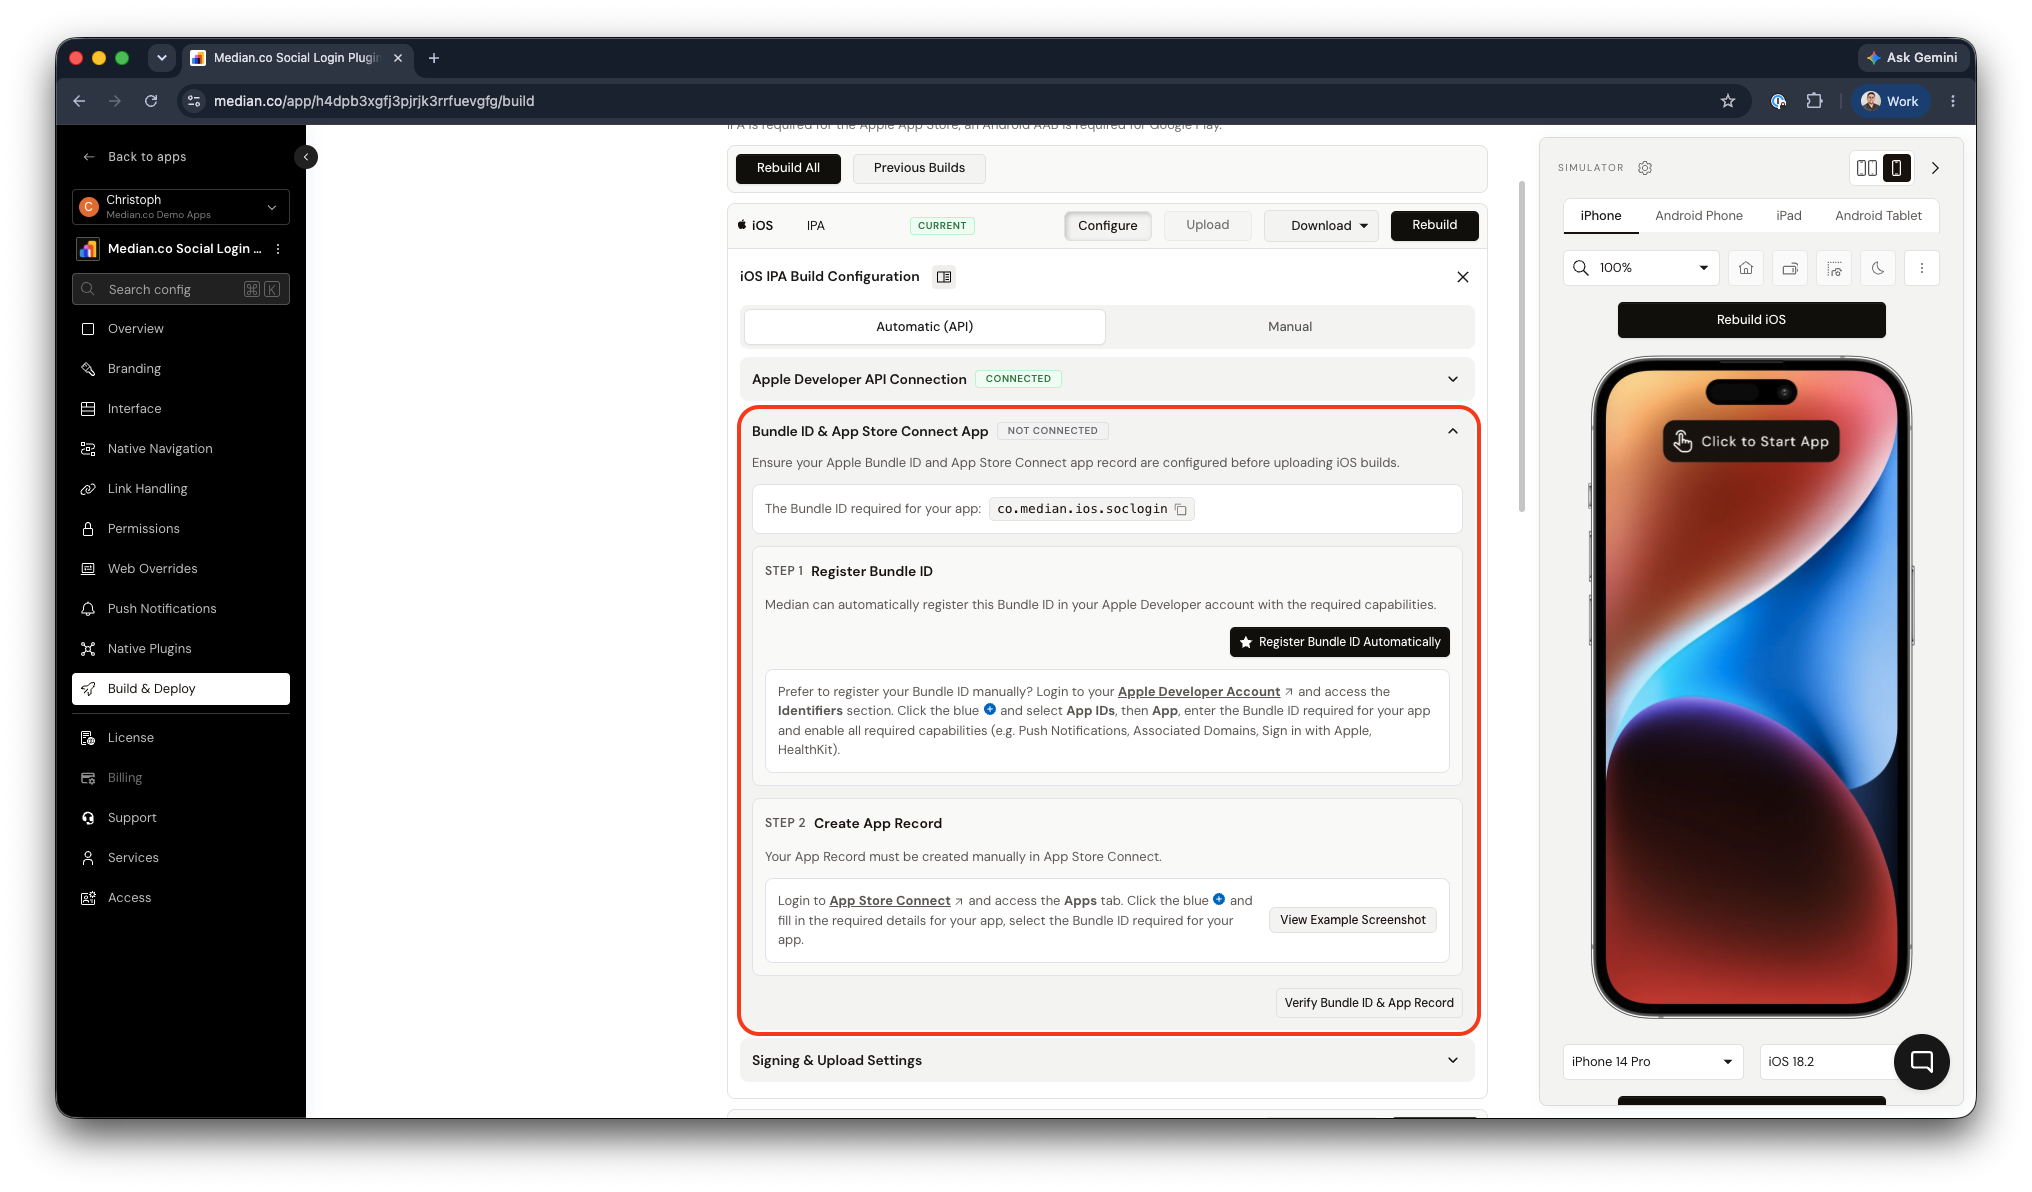
Bundle ID & App Store Connect Section
Register the Bundle ID
Automatically
Click Register Bundle ID Automatically to have Median register this Bundle ID with your Apple Developer account, including the capabilities your app needs (for example, Push Notifications, Associated Domains, or Sign in with Apple).
Manually
If you'd rather register it yourself: sign in to your Apple Developer account, open Identifiers, click the + button, choose App IDs → App, enter the Bundle ID shown above, and enable the capabilities your app requires.
If you manually register your app, Median cannot create the app record on your behalf.
Sign in to App Store Connect, go to the Apps tab, click the + button, and fill in the required details, selecting the Bundle ID from Step 1 when prompted.
Section 3: Signing & Upload Settings
This section helps you configure the right signing profile for your app.
| Profile | Use Case |
|---|---|
| Distribution Profile | Use this for uploading to App Store Connect, for TestFlight distribution, or for release to the App Store. |
| Development Profile | Use this for testing directly on devices you've registered in Registering Testing Devices, outside of App Store Connect. |
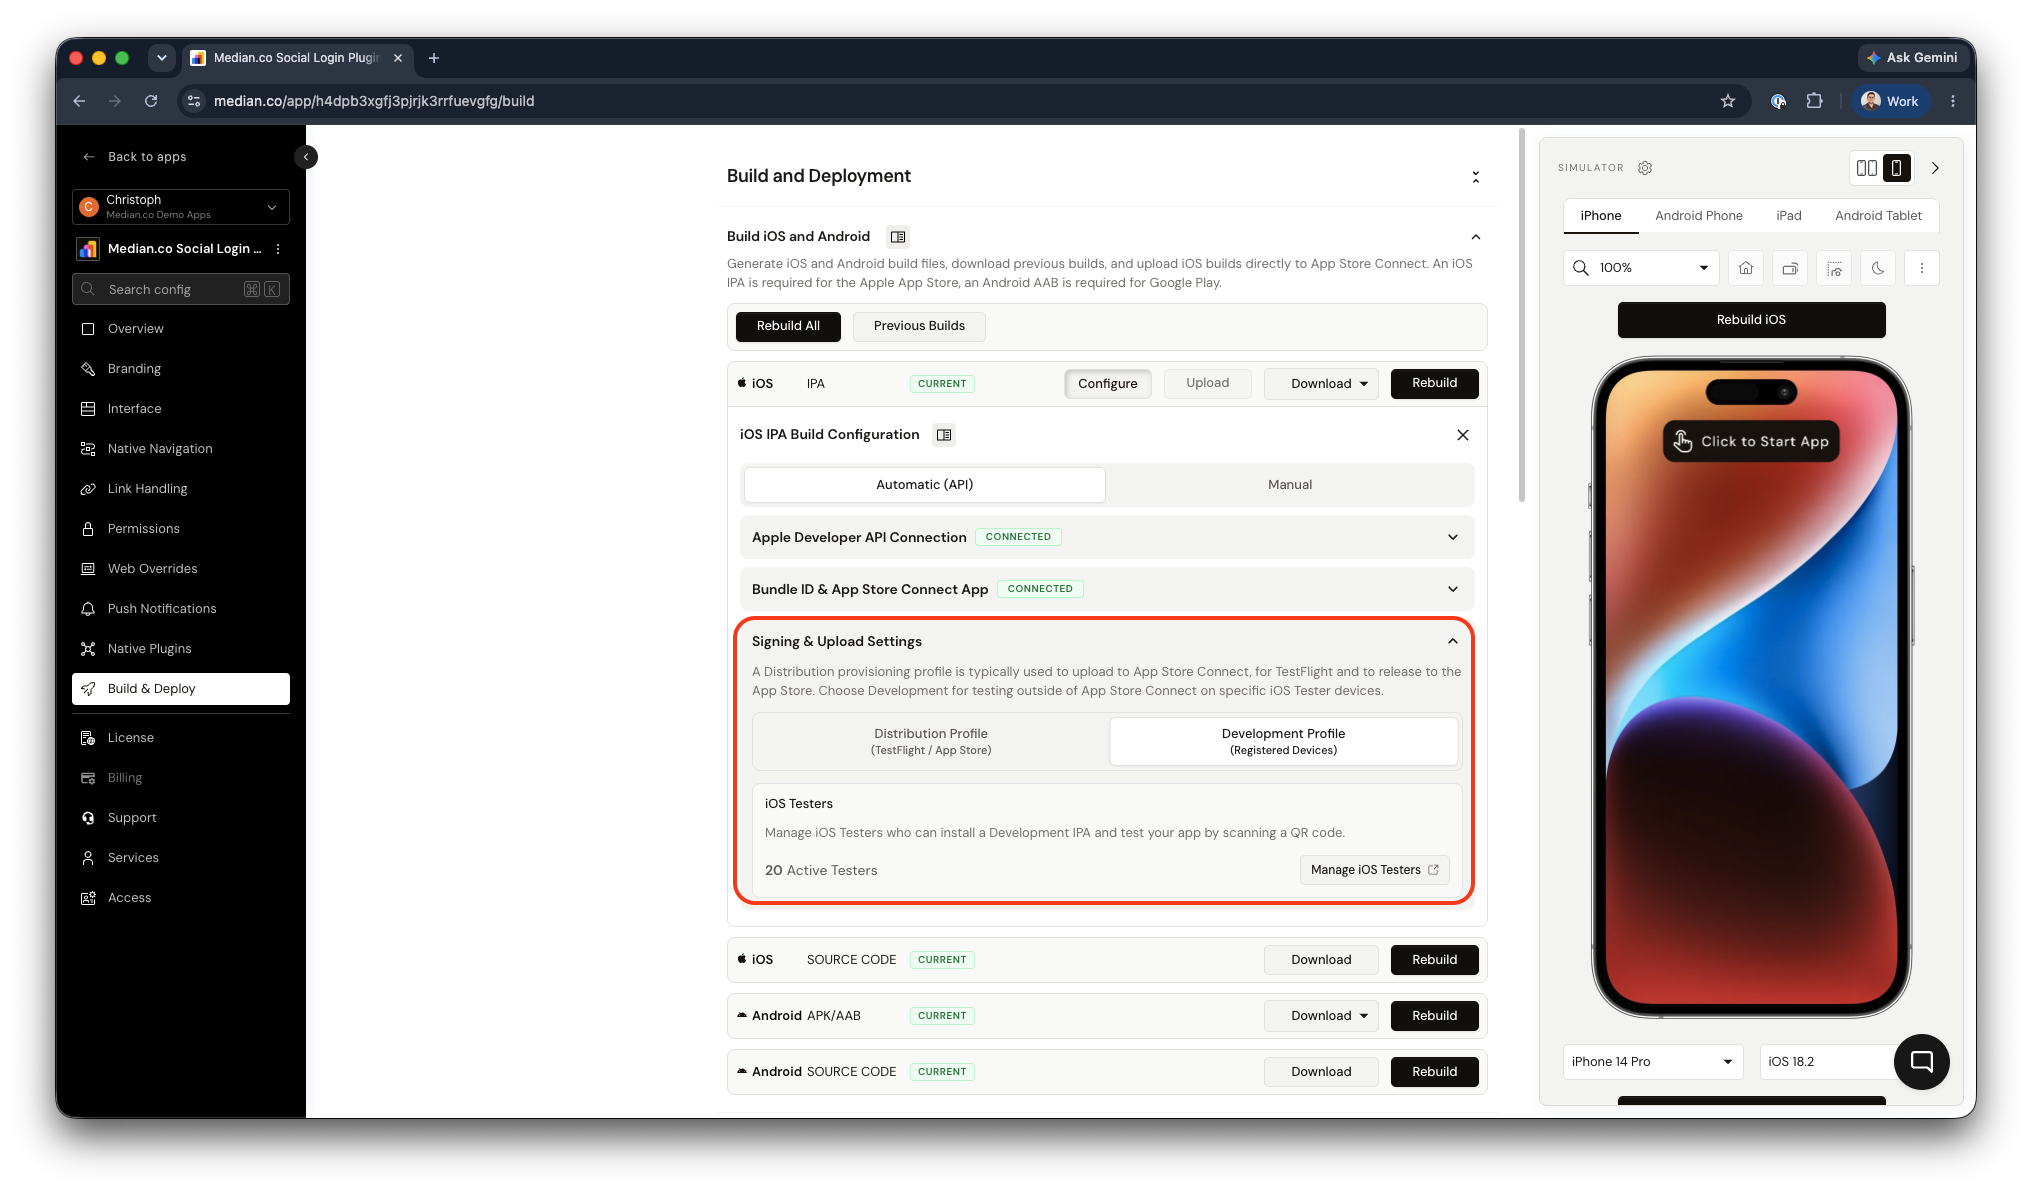
Signing & Upload Settings Section
Option 2 - Upload your own signing assets (Manual tab)
If you'd rather not connect an App Store Connect API key or are unable to due to organizational or security policy, switch the top-level toggle to Manual and provide your own signing assets directly.
This form will allow you to manually create and upload your own distribution certificate and provisioning profile.
CautionThis process is significantly more complex and is recommended only if you're familiar with Apple’s certificate and profile management process.
To upload your own assets:
- Create a distribution certificate and a provisioning profile using Apple’s Developer Portal and download the resulting
.cerfile. - You will need a
.p12file of your certificate, not just the.cerfile provided by Apple. This step must be done on a Mac, and involves exporting the certificate from Keychain Access. - Open your app in App Studio.
- Navigate to Build & Deploy, click Configure in the iOS IPA section, and upload the
.p12file (with its password) and the provisioning profile in the Manual tab.
If you encounter issues generating these assets, we encourage you to post your question in our online discussion forum where the Median team and community are always willing to help.
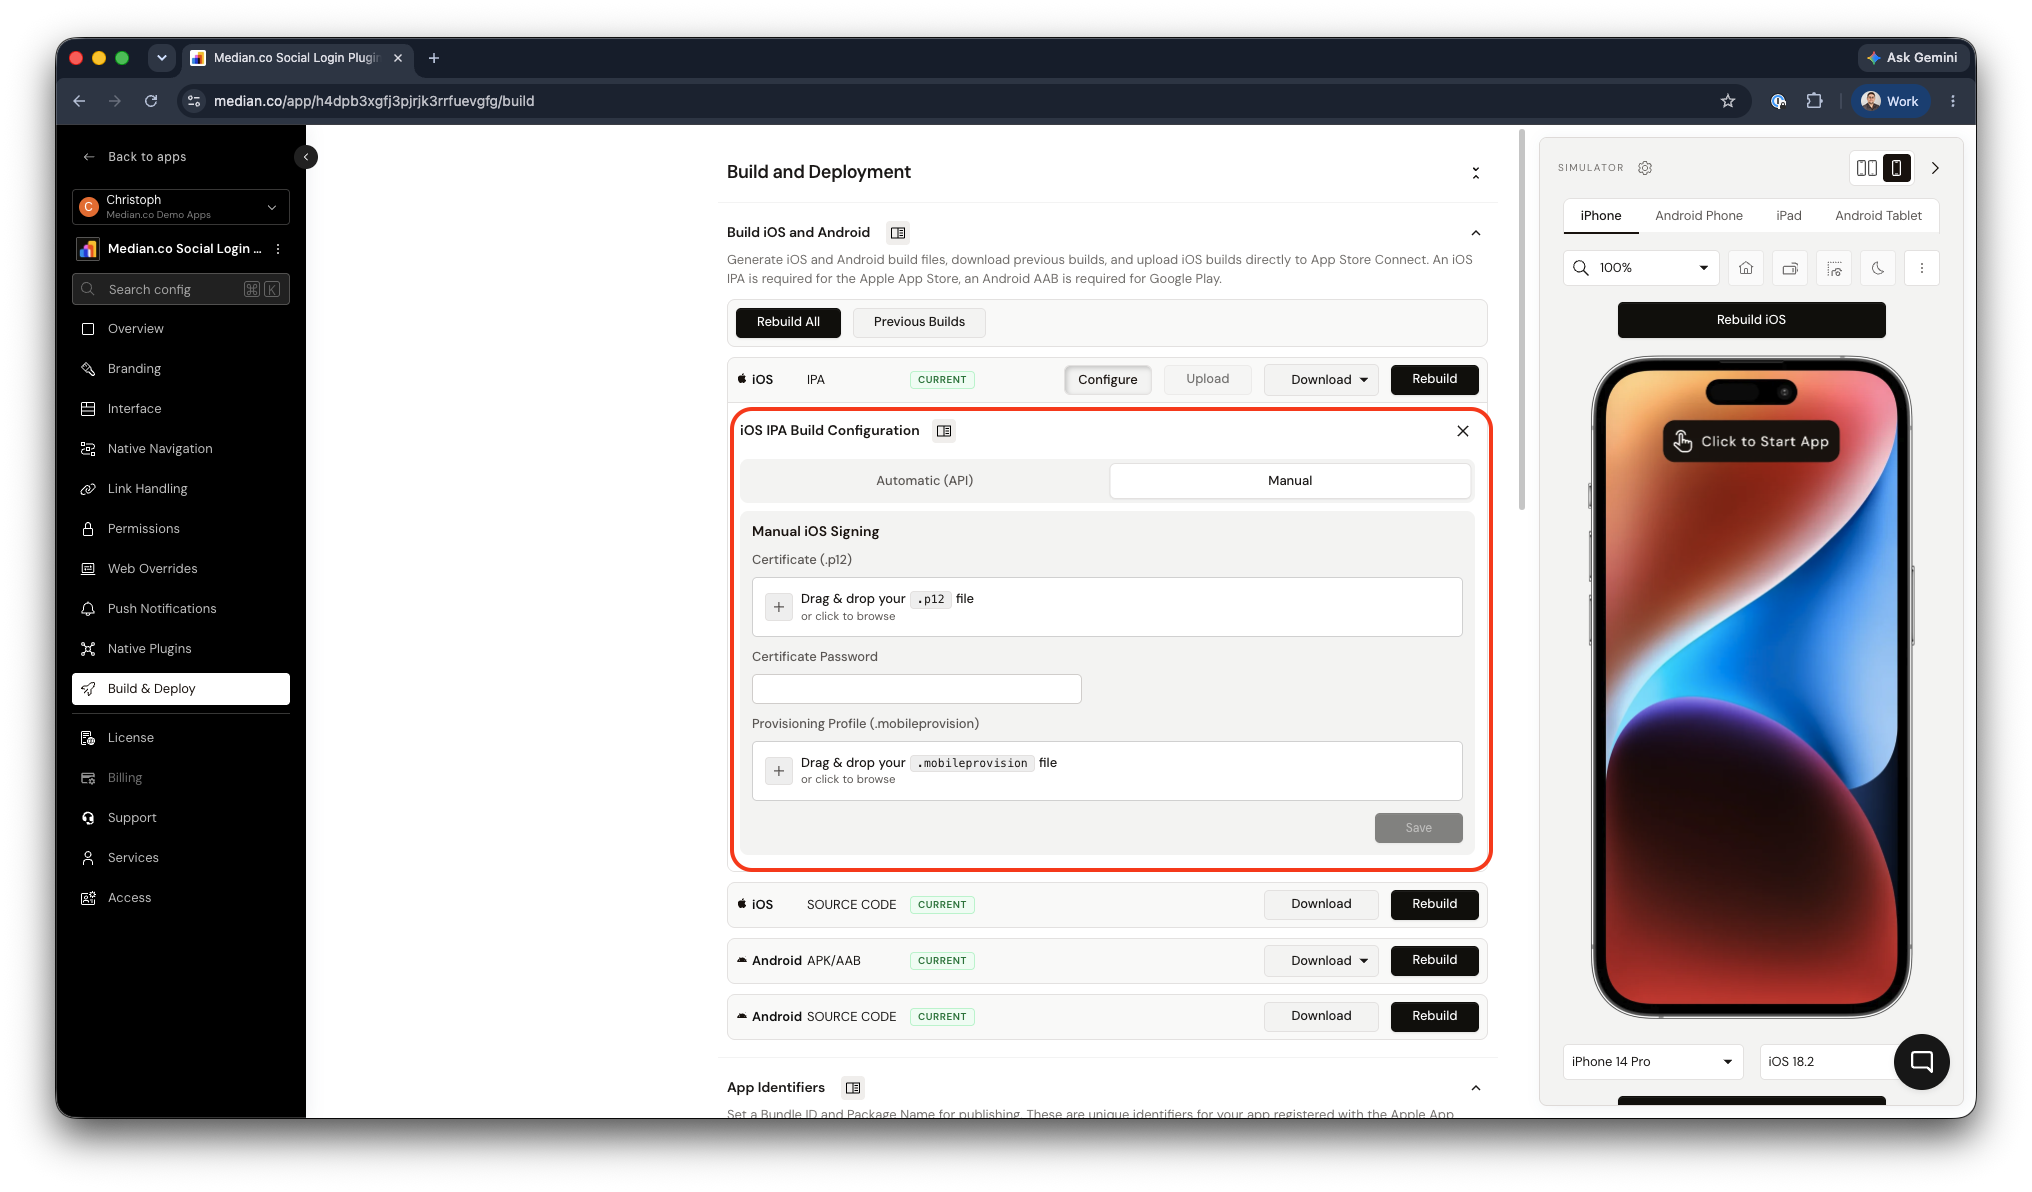
Manual Provisioning
Next Step
Return to the Building an iOS Binary overview to start your build, or continue on to Install iOS IPA once your build finishes.
Updated about 1 month ago