
Facebook Login Configuration
Overview
This guide walks you through creating and configuring a Facebook App to enable Facebook Login. You'll configure settings in Meta's Developer Portal and gather the credentials needed for Median App Studio.
Before you begin
Make sure you have:
- A Facebook Developer account (create one here)
- Your app's iOS Bundle ID (example:
co.median.ios.soclogin) - Your app's Android Package Name (example:
co.median.android.soclogin) - our app's Android Key Hash (available from median.deviceInfo() or from the Social Login plugin page in App Studio)
- An Admin or Developer role in your Facebook account
- A verified Business in Meta Business Manager
Step 1: Create your Facebook app
1.1 Start a new app
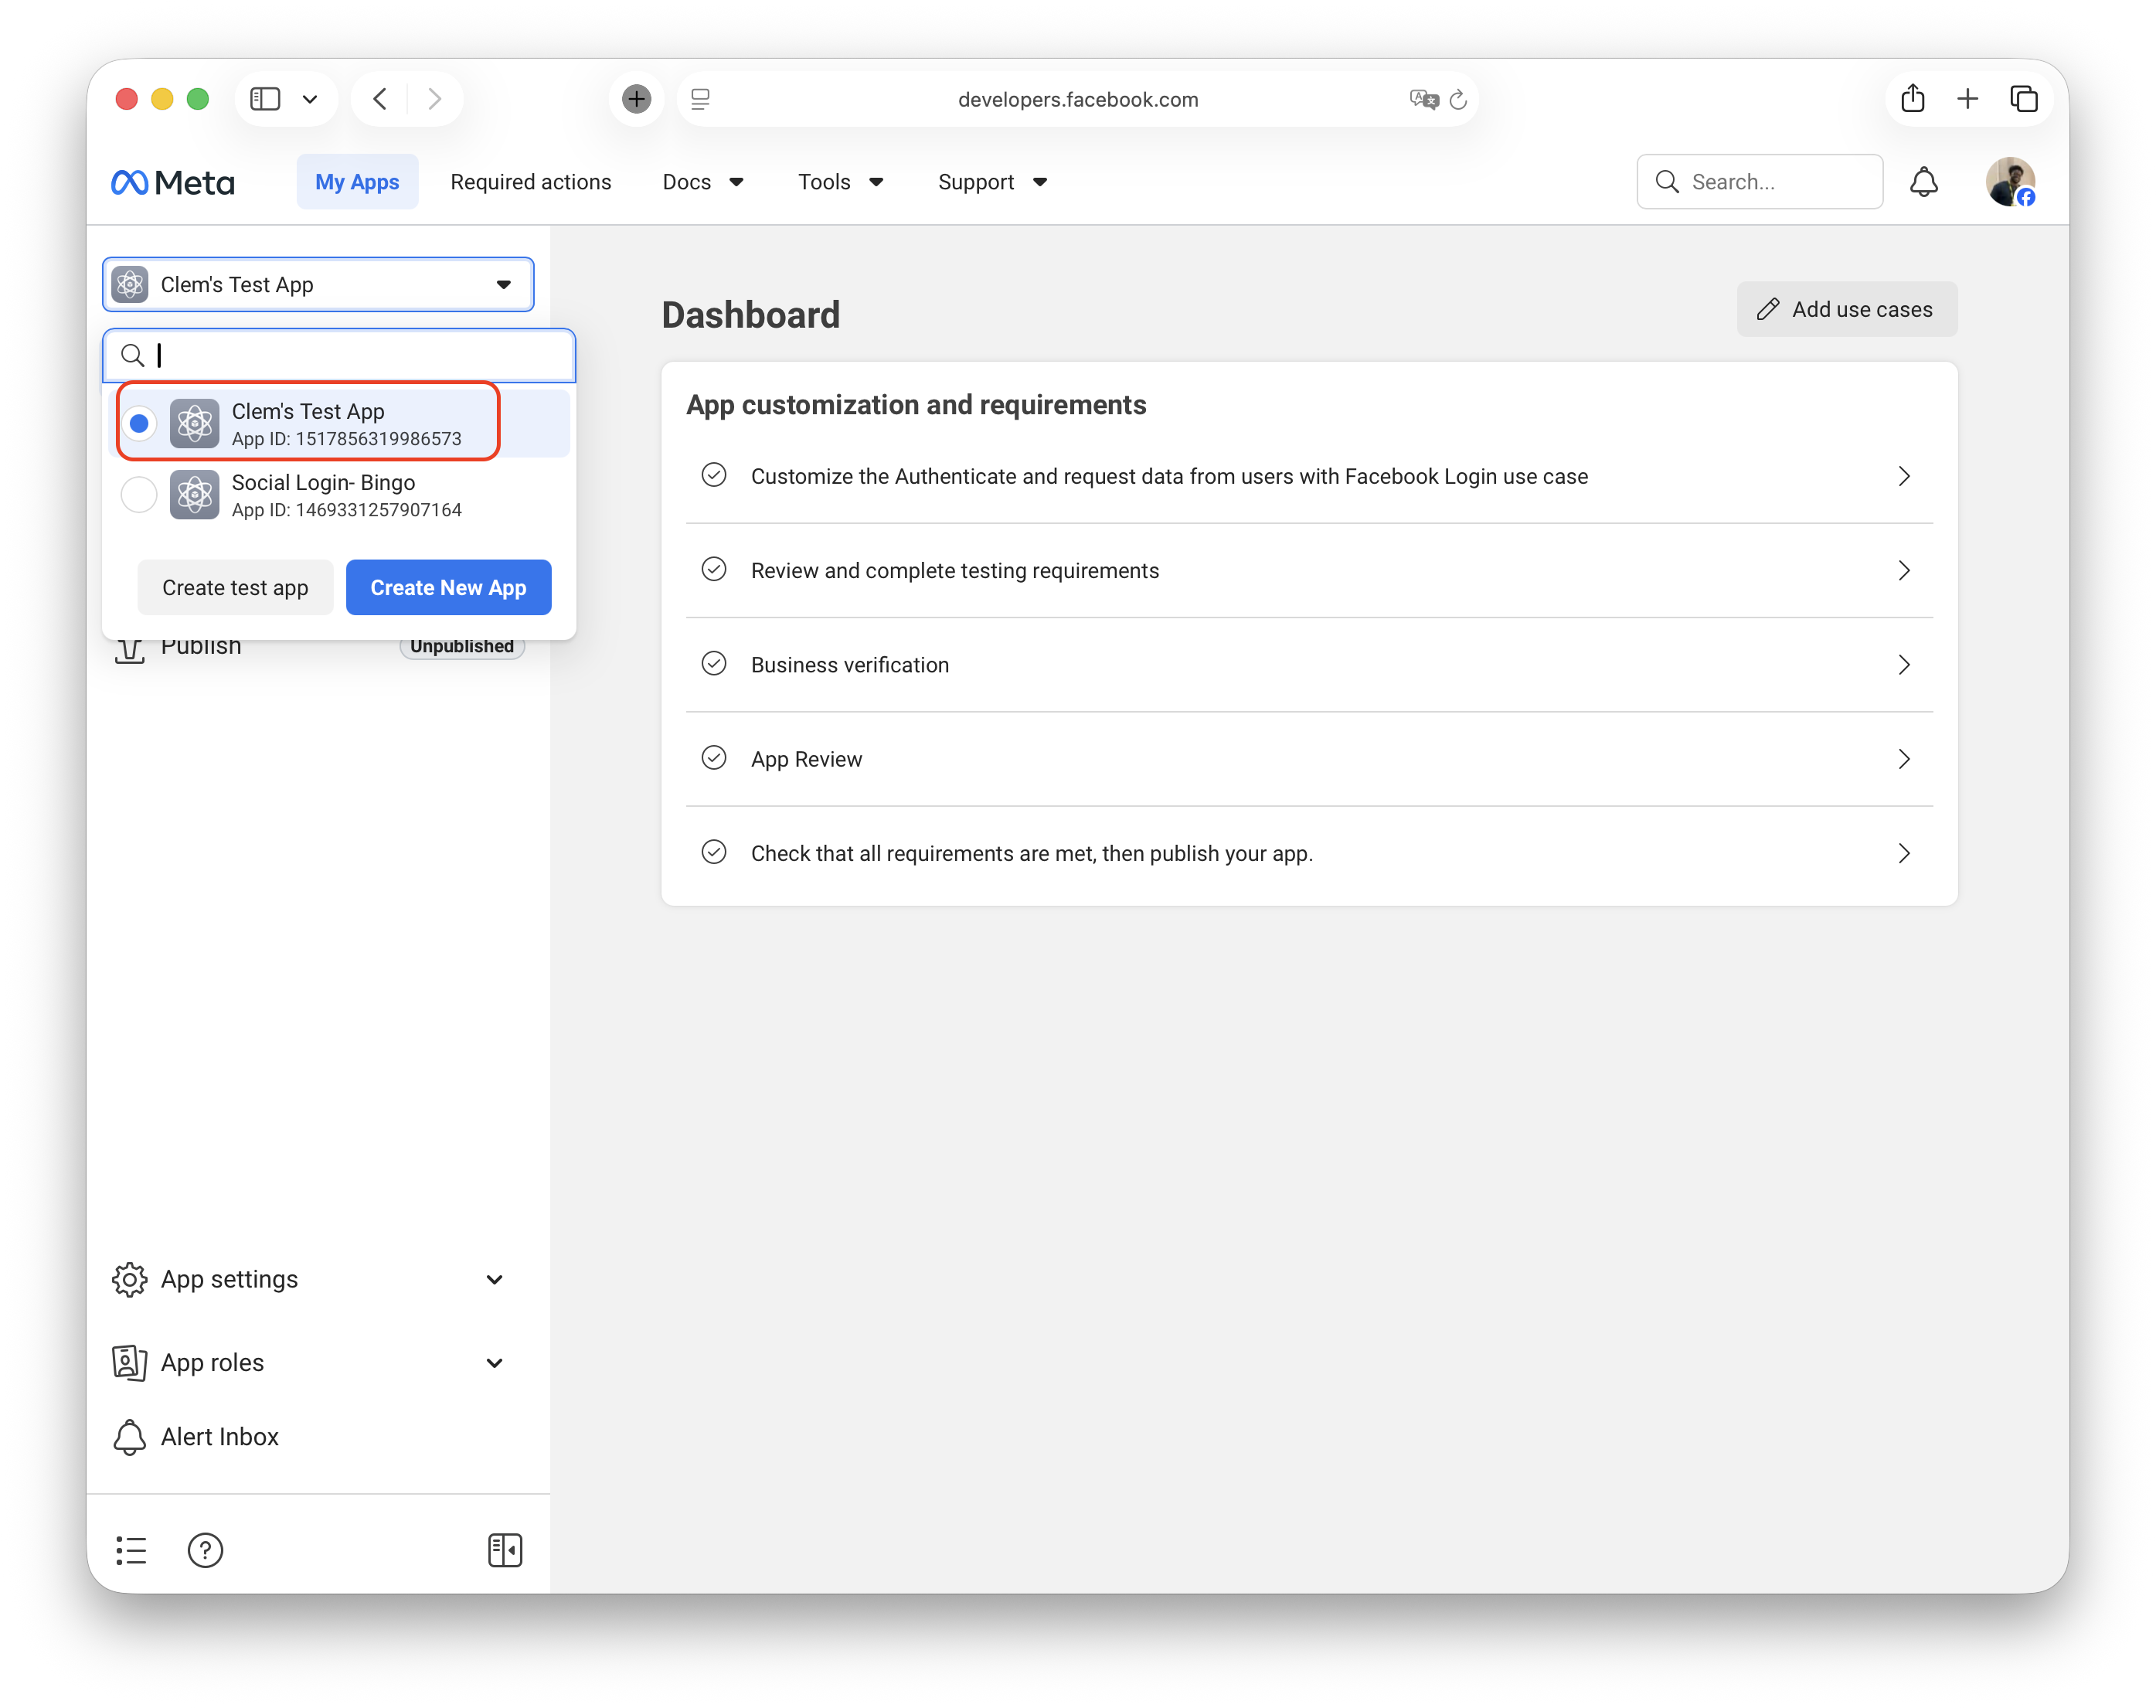
- Log in to Facebook Developers.
- Click My Apps → Create App.

Click 'Create App'
- Select Authenticate and request data from users with Facebook Login.
- Click Next.
1.2 Add app details
- App Name: Enter a user-friendly name (shown to users during login)
- App Contact Email: Enter a valid contact email
- Click Create App.
Save your App ID and Display Name: After creation, you'll see your App ID and Display Name in the top-left corner. Copy these values, you'll need them later for Median App Studio configuration.
Display Name (eg 'Test App') and App ID (eg 845xxxxxxxx5)
Step 2: Configure basic settings
2.1 Configure OAuth settings
- In the left sidebar click on Use cases
- For Authenticate and request data from users with Facebook Login, click on Customize
- Go to the Settings section
- Enable "Login with the JavaScript SDK" (toggle on)
- Add your Valid OAuth Redirect URIs:
- Example:
https://yourdomain.com/auth/callback
- Example:
- Add your Allowed Domains for the JavaScript SDK:
- Example:
yourdomain.com
- Example:
- Click Save Changes.
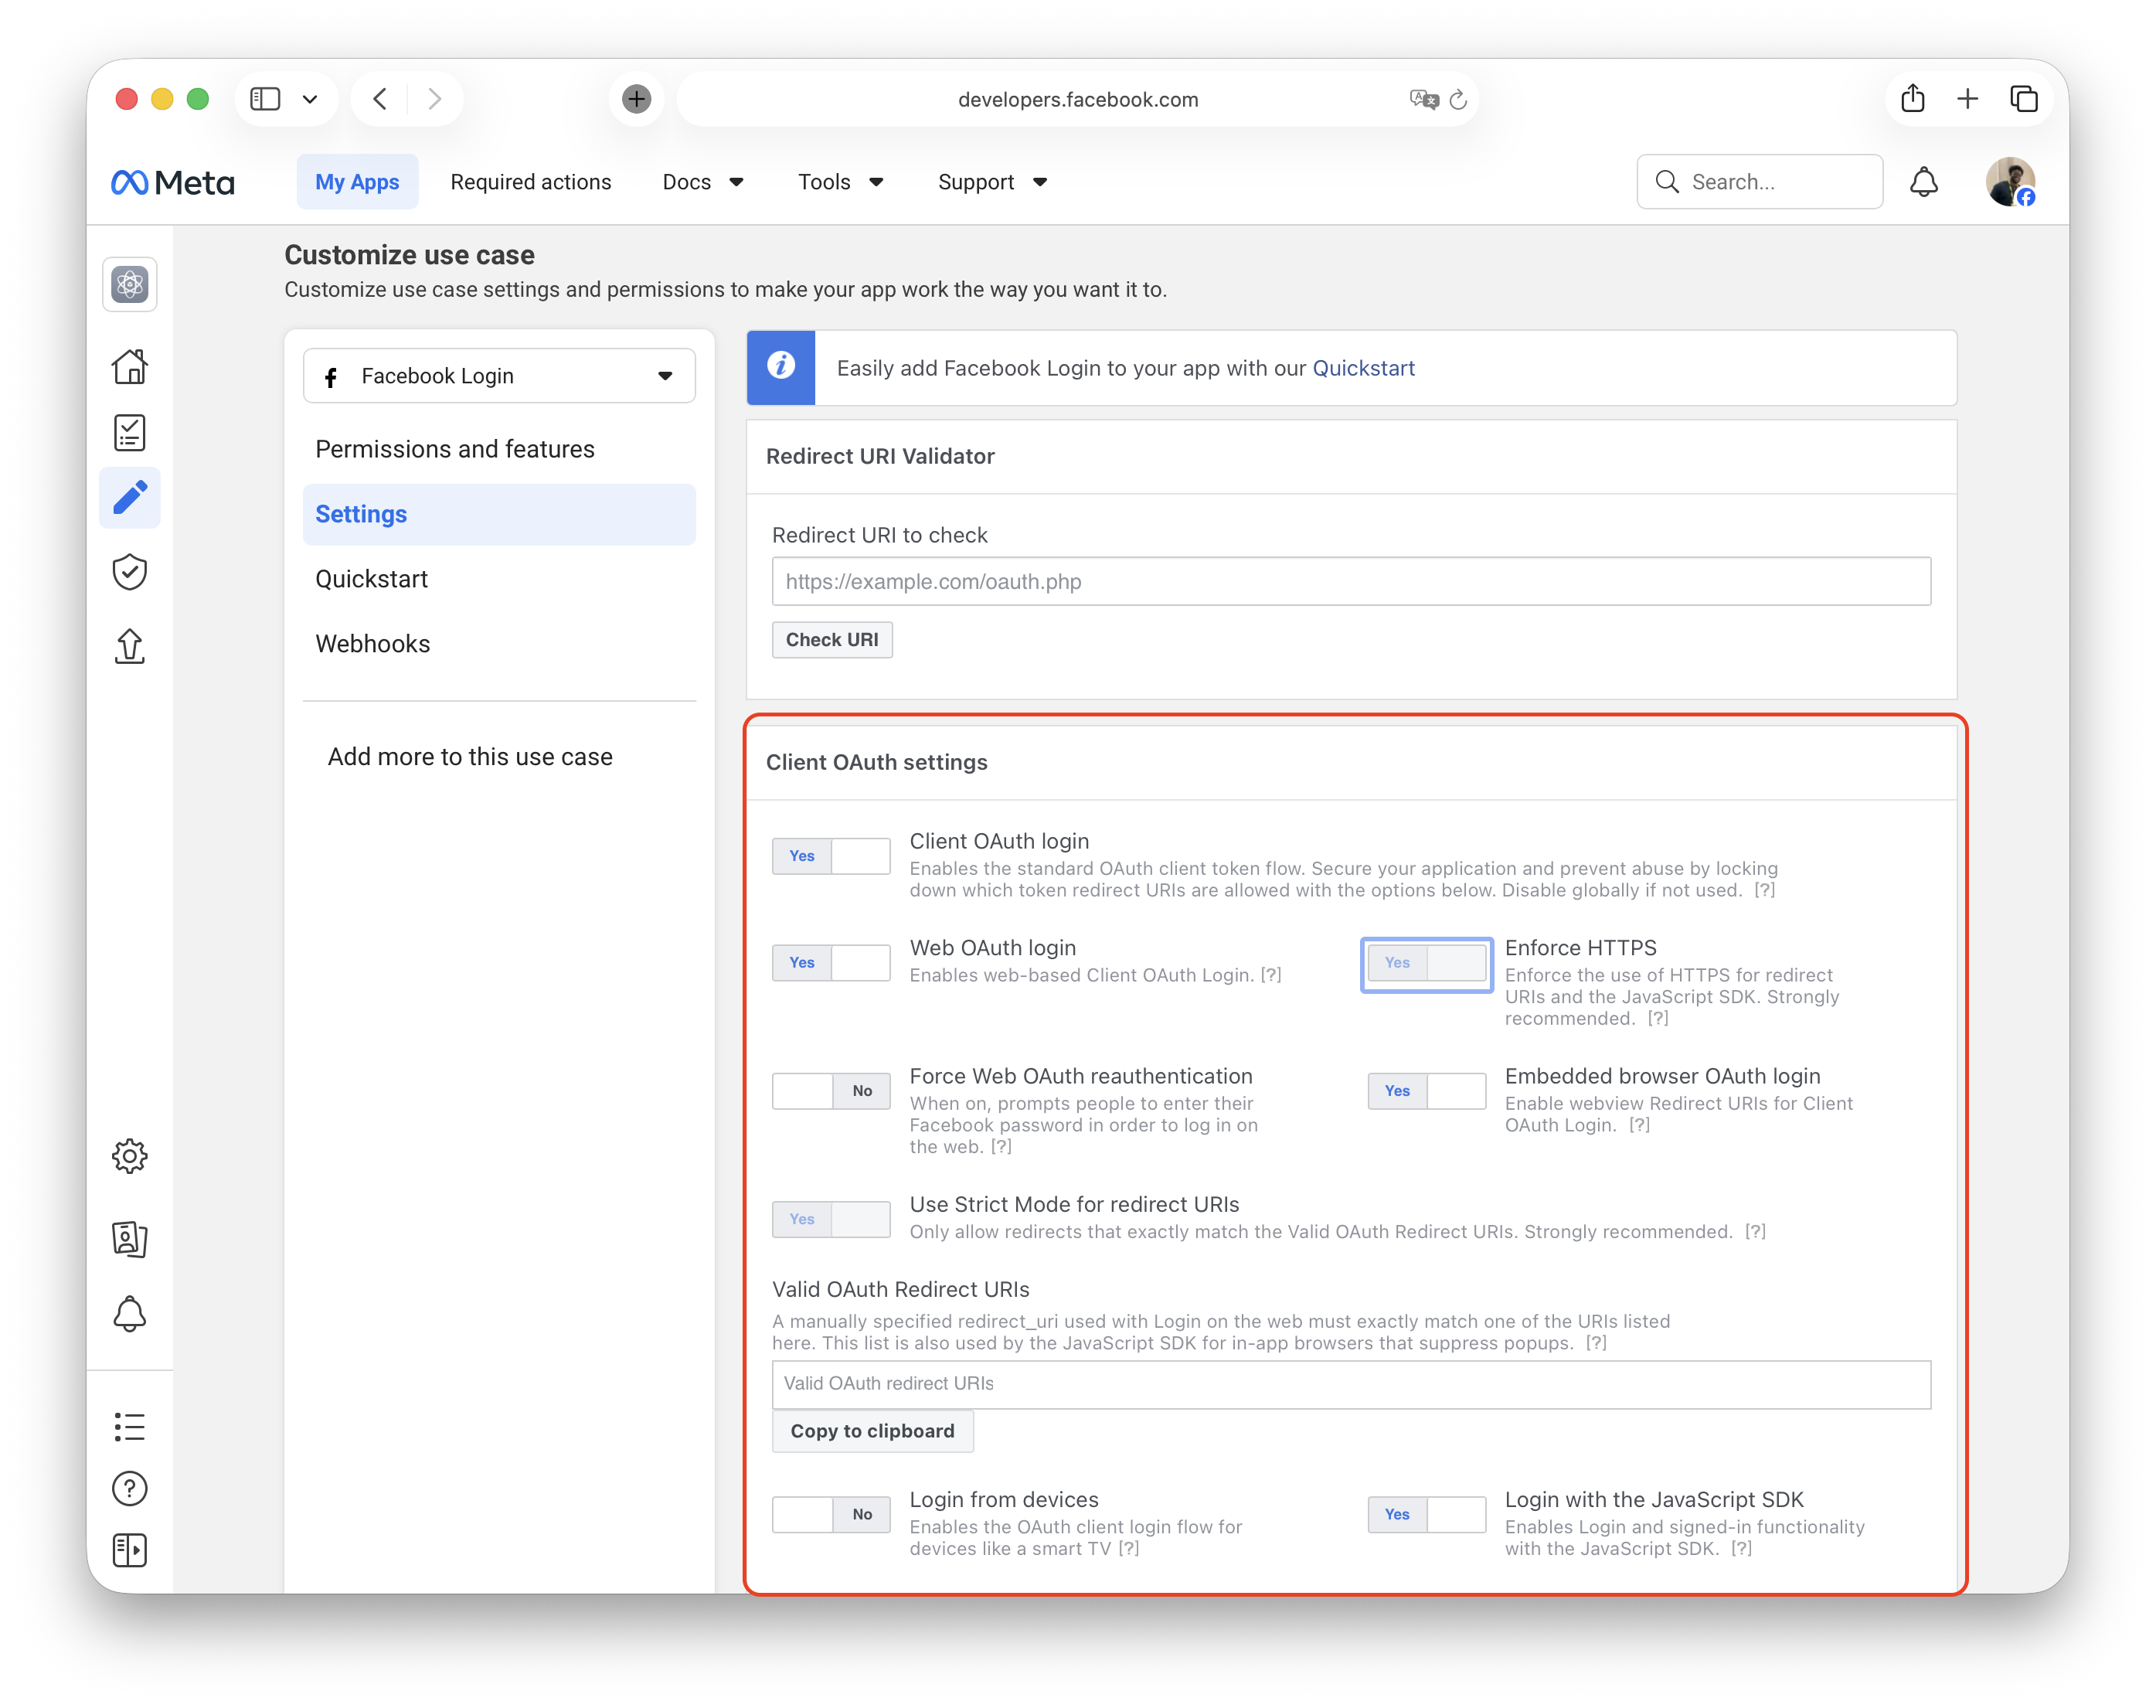
Client OAuth Settings, JavaScript SDK, Redirect URLs & Domains
2.2 Configure permissions
- In the left sidebar: App Review → Permissions and Features.
- Add
email(required for user identification)public_profile(required for basic user info)
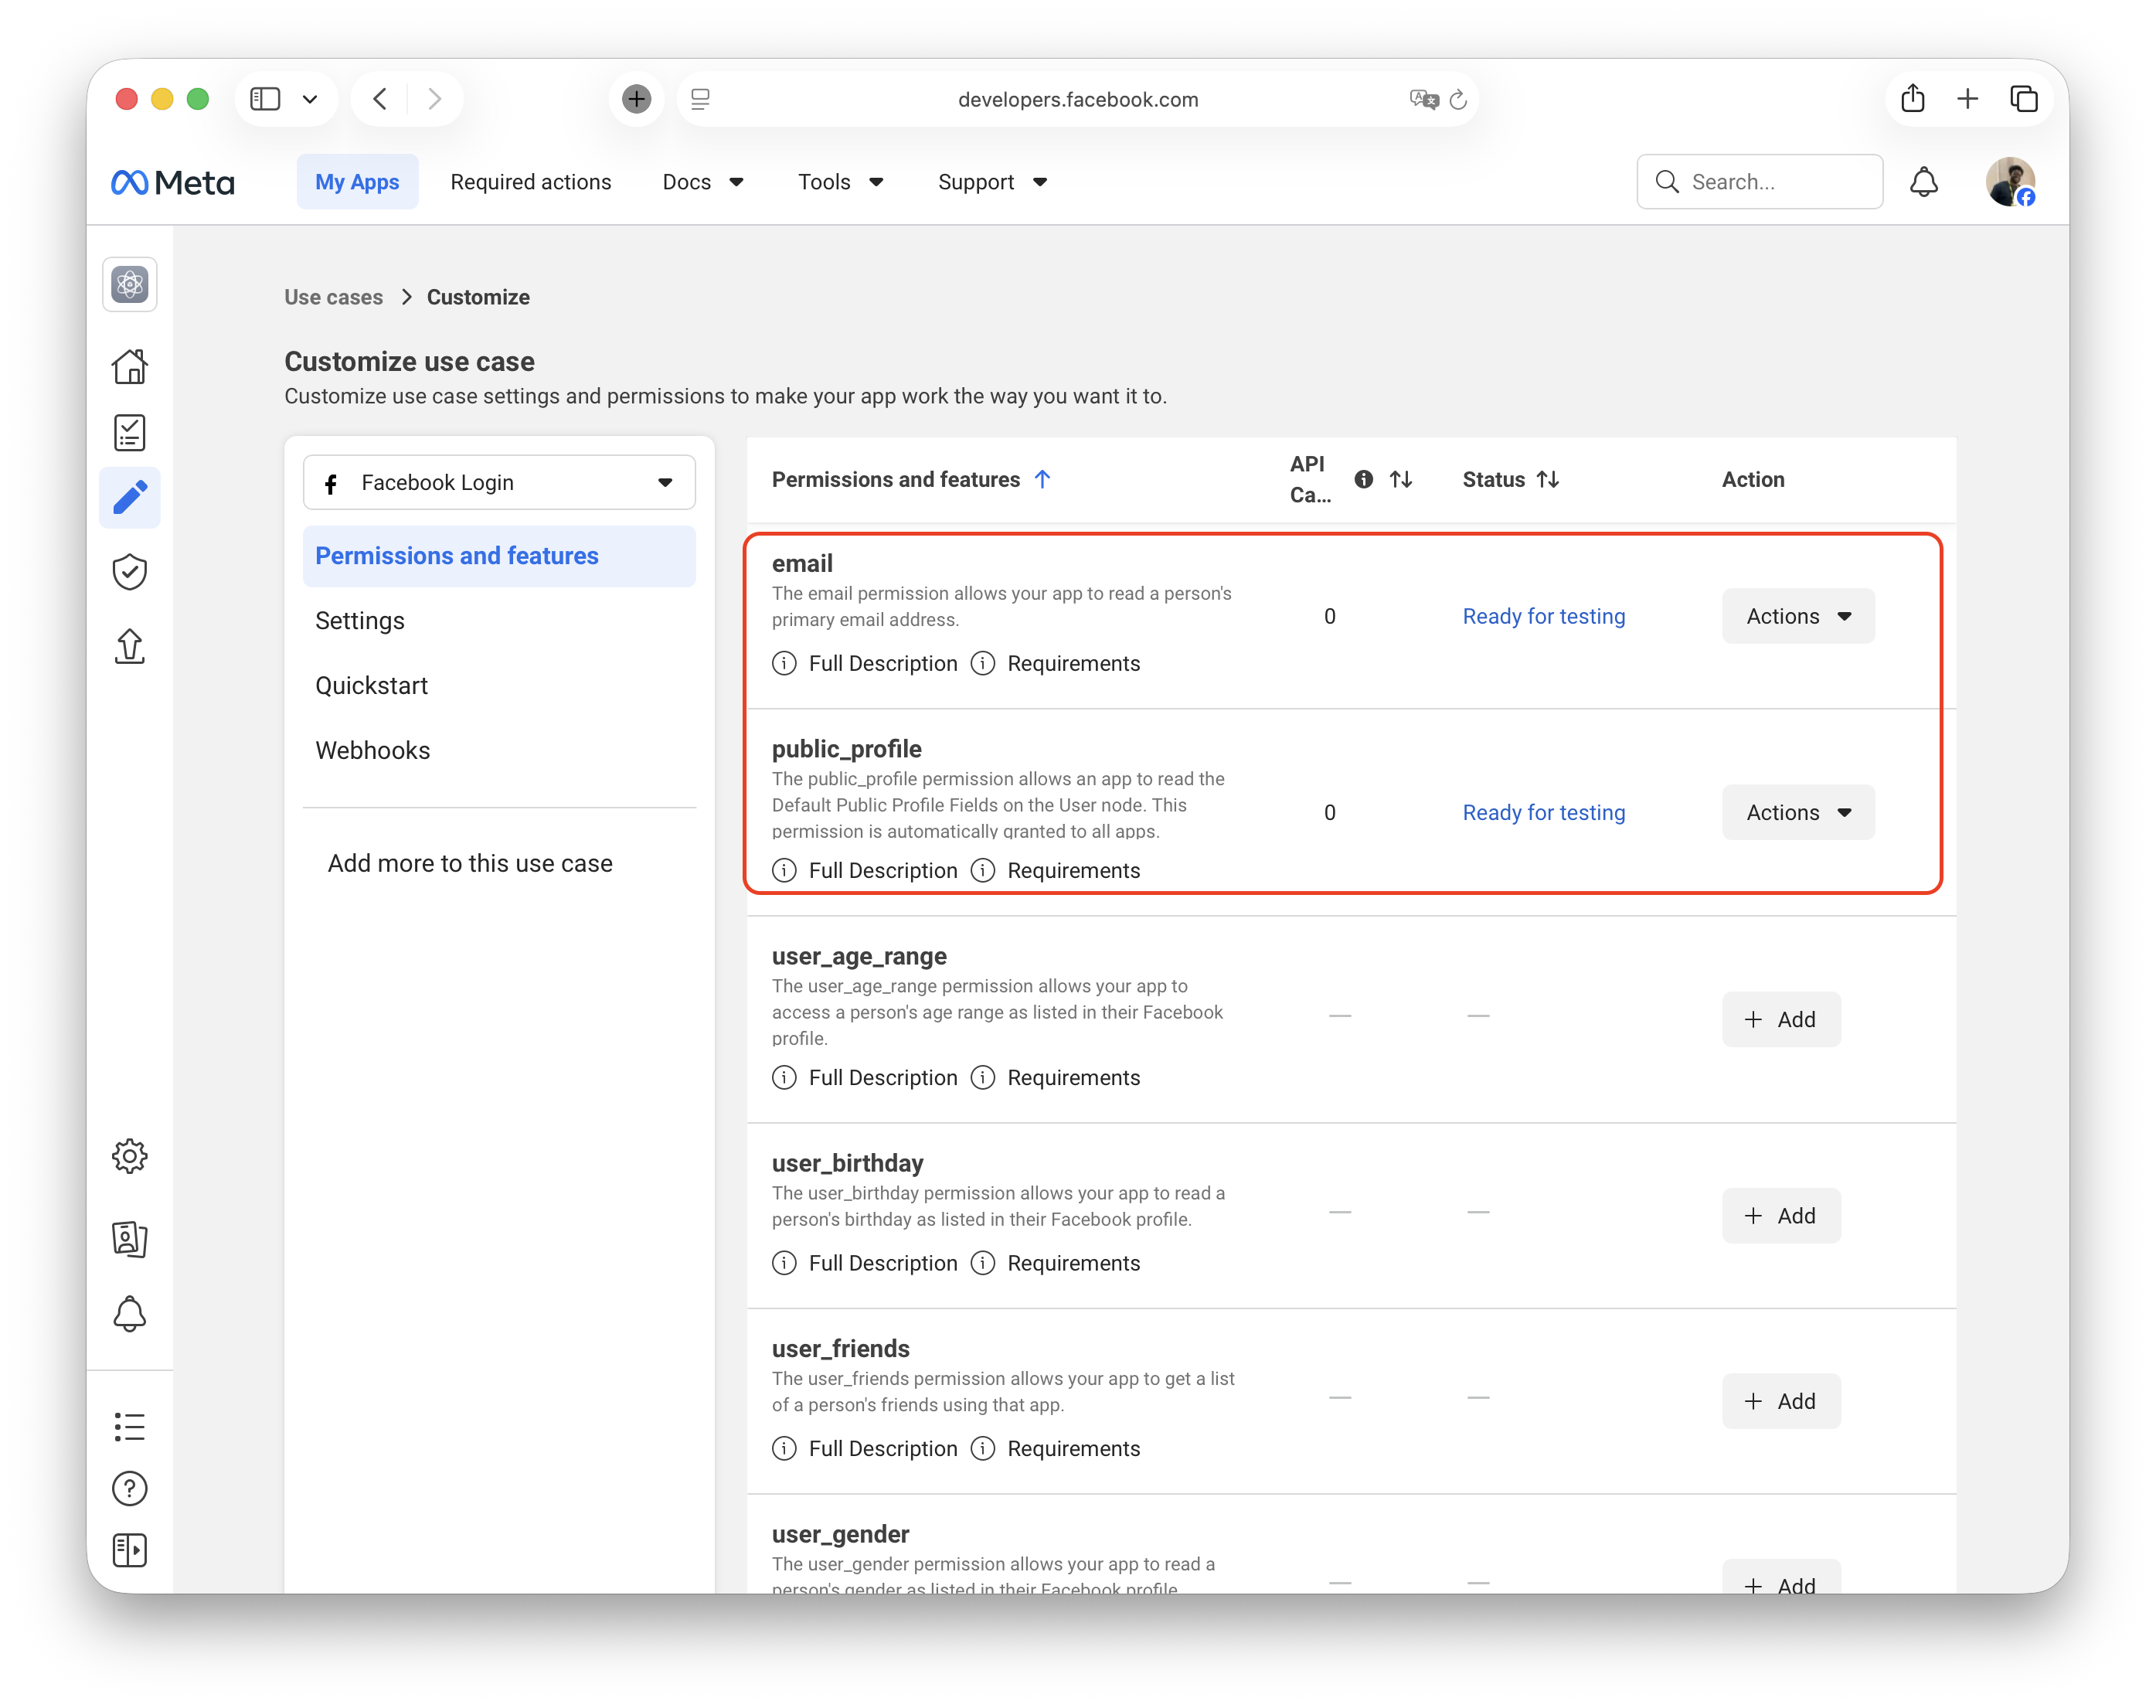
App Permission & Features
App Review Required
Some permissions require Facebook's approval before going live. Learn about Facebook App Review
2.3 Get your client token
- In the left sidebar: Settings → Advanced.
- Scroll to the Security section.
- Click Show next to Client Token.
- Copy and save this token, you'll need it for Median App Studio configuration.
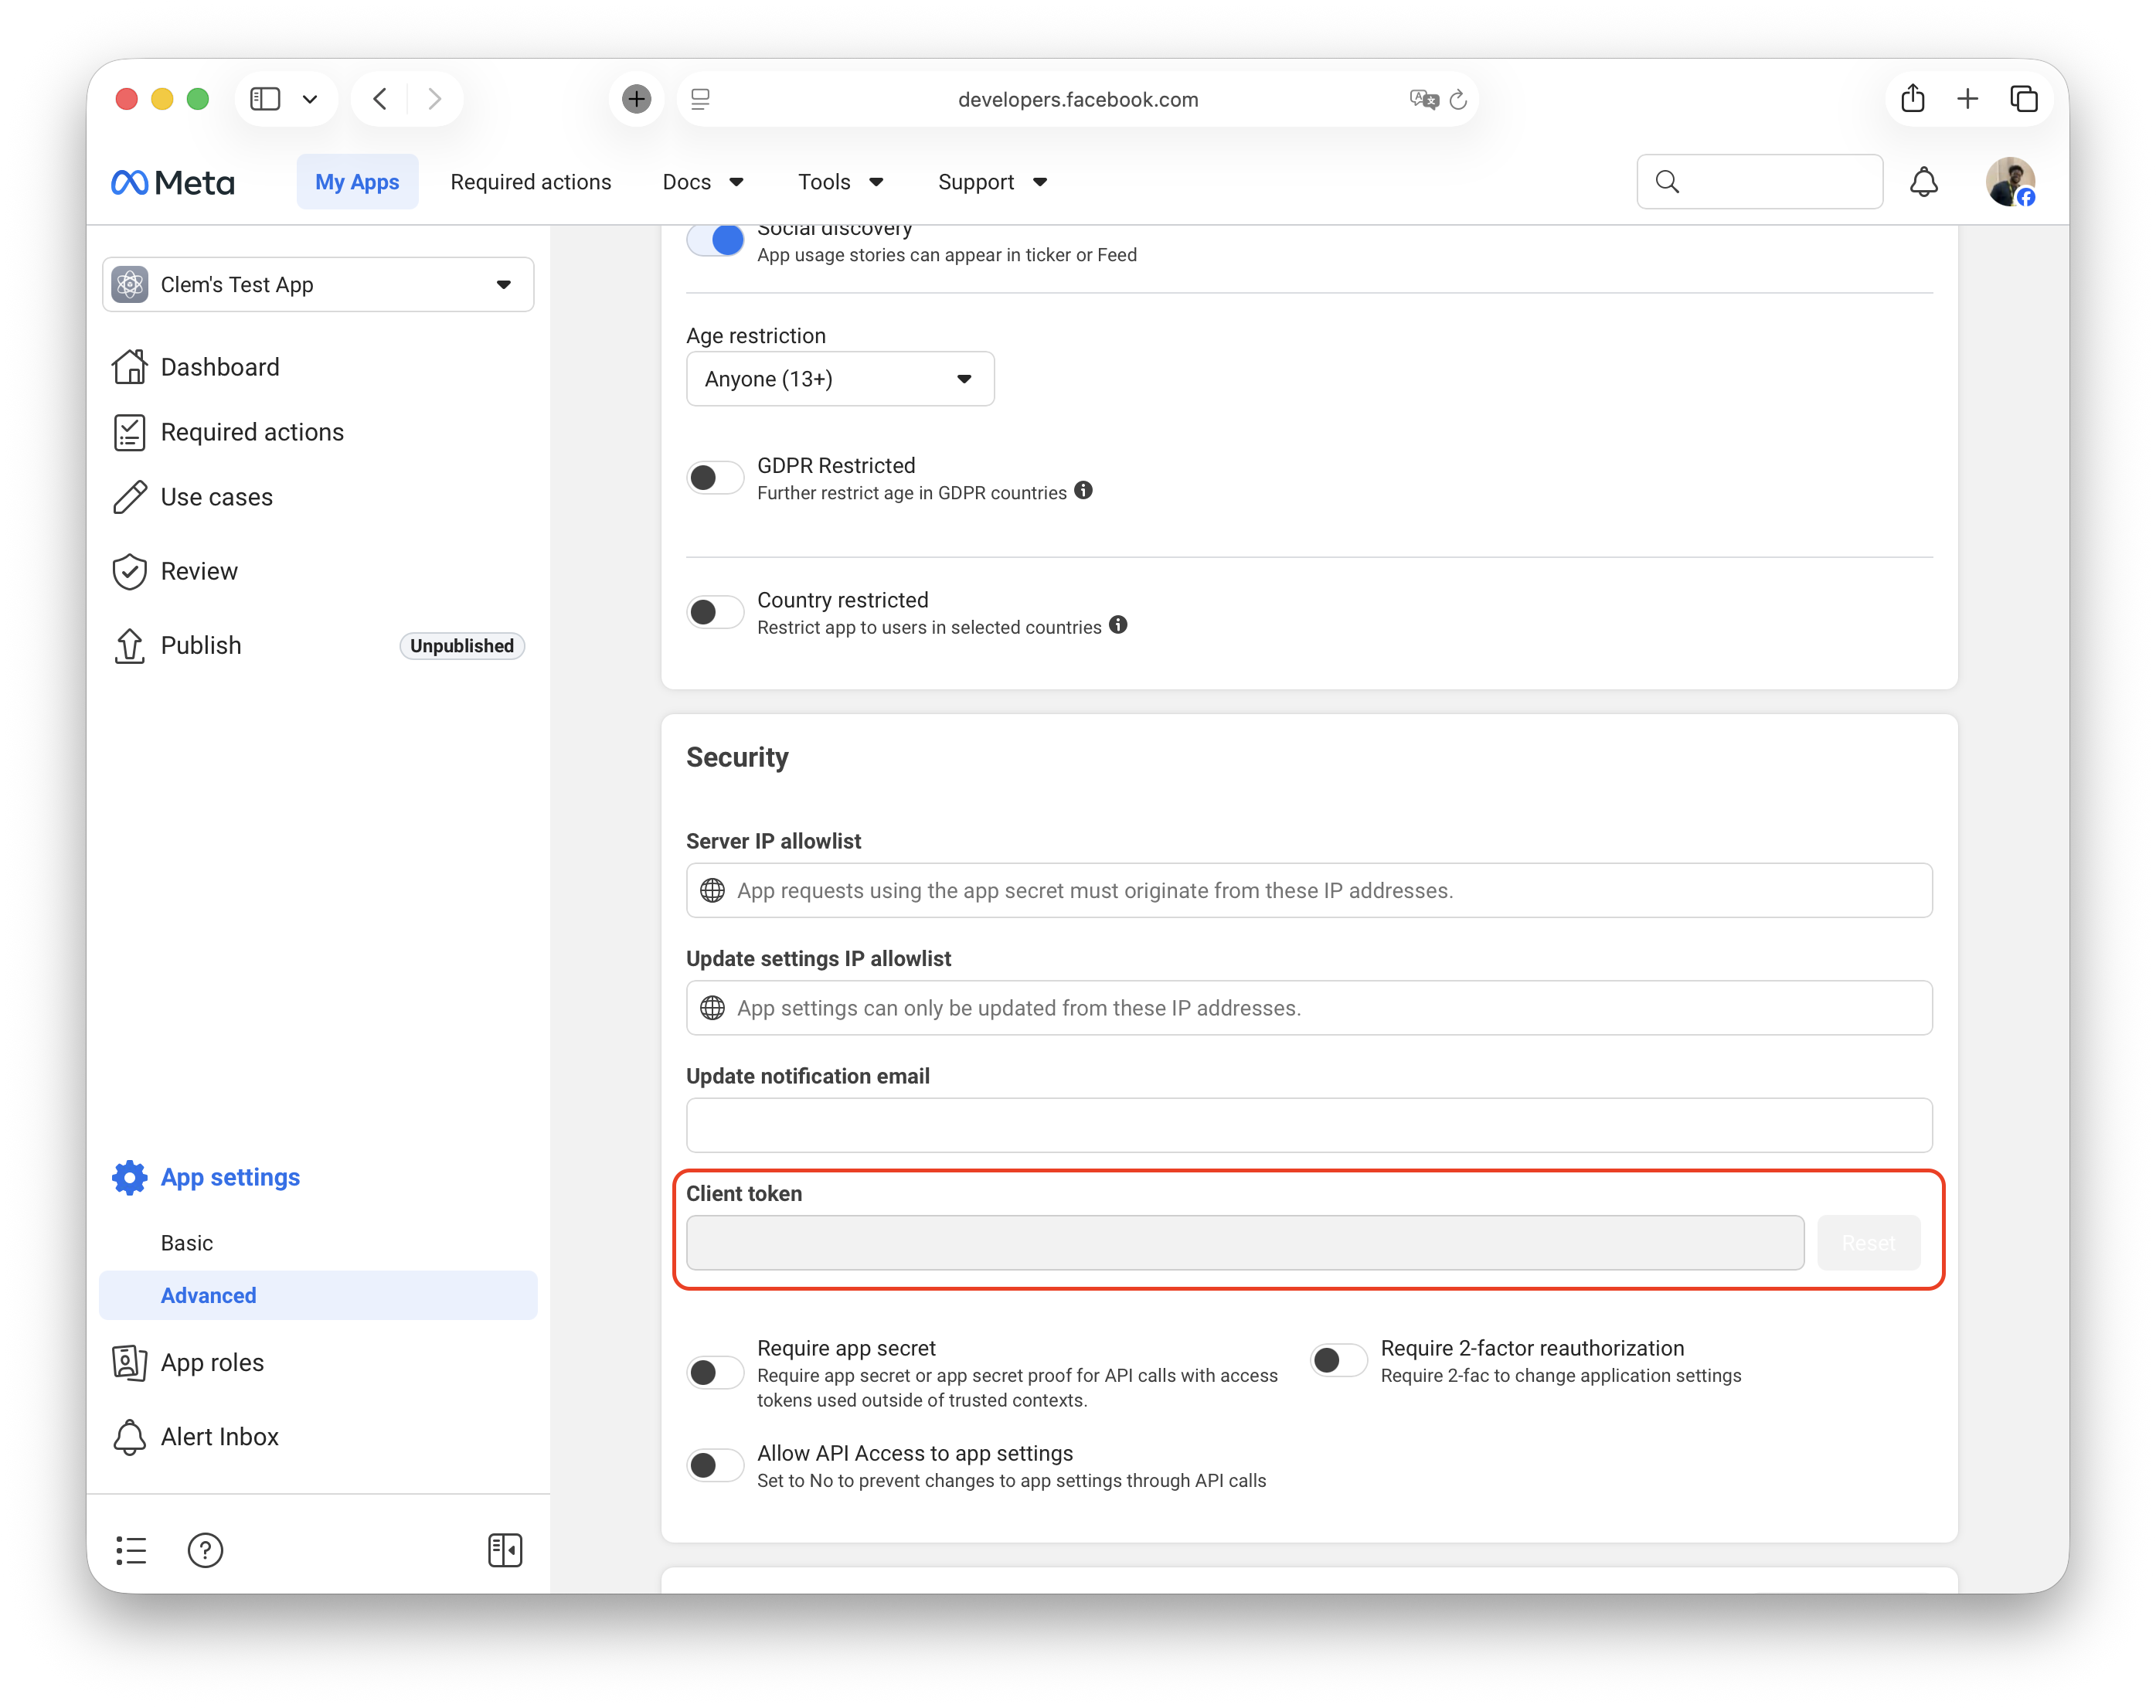
Facebook Client Token
Step 3: Add platform configurations
You need to configure both iOS and Android platforms (these are separate, parallel steps).
- In left sidebar: Settings → Basic.
- Scroll to bottom → Click "+ Add Platform".

- Select iOS.
- Fill in:
- Bundle ID: Your iOS Bundle ID (example:
co.median.ios.soclogin) - Add any test/development Bundle IDs if applicable.
- Bundle ID: Your iOS Bundle ID (example:
- Click Save Changes.
Testing Tip
If you have multiple development builds, add each Bundle ID variant (e.g., com.yourapp.debug)
Website Configuration:
- Same screen: Click "+ Add Platform" again
- Select Website
- Site URL: Enter your website URL (example:
https://yourdomain.com) - Click Save Changes
Meta Portal Instability
If you encounter saving issues, try: different browser, incognito mode, or VPN connection. You can skip the "iPhone Store ID" field during initial setup.
- In left sidebar: Settings → Basic.
- Scroll to bottom → Click "+ Add Platform".
-
Select Android.
-
Select Google Play store.
-
Click Next.
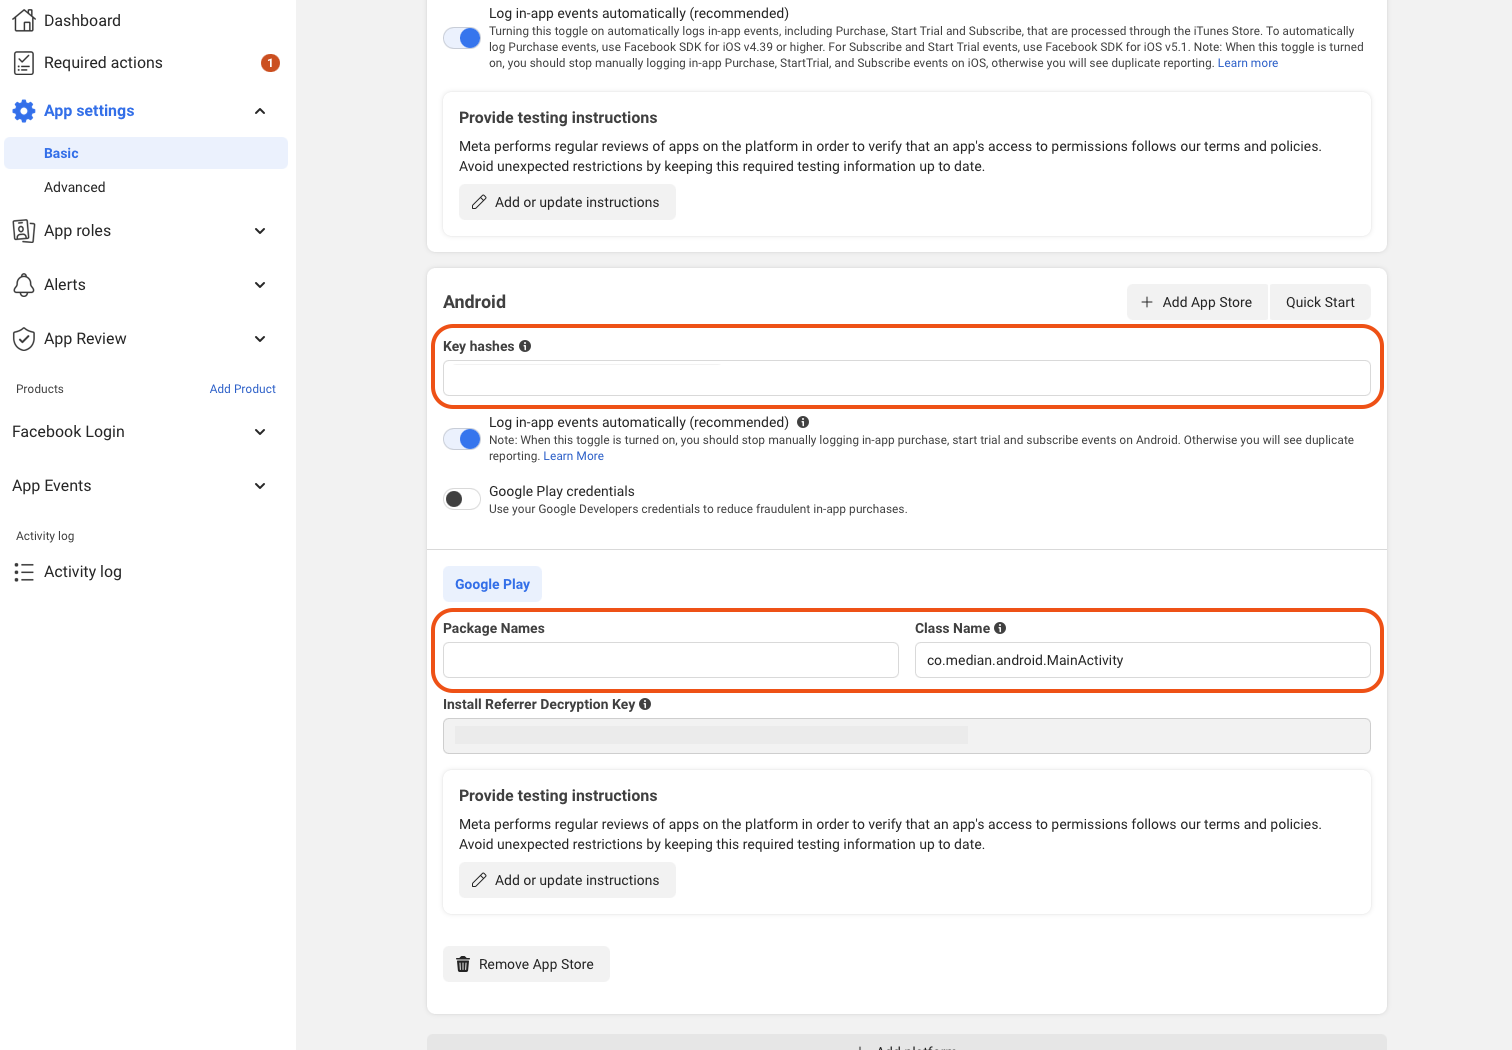
Fill in Required Fields:
-
Package Name
Your Android app's unique identifier
Example:co.median.android.soclogin -
Class Name
Use this exact value:co.median.android.MainActivity -
Key Hash
Your Android signing certificate hash. If you are using Median to sign your Android app, contact our team to obtain this value.
If using Google Play App Signing:
- Go to Google Play Console → Release → Setup → App Integrity.
- Copy your SHA-1 certificate fingerprint.
- Convert it using this command:
echo YOUR_SHA1_VALUE | xxd -r -p | openssl base64For local development keystore:
keytool -keystore <path-to-keystore> -list -vDefault password:android
Multiple Development MachinesCreate a separate OAuth client for each developer's machine using their local SHA-1 fingerprint.
For Debug Builds:
If building debug variants, append .debug to your Package Name:
- Production:
co.median.android.soclogin - Debug:
co.median.android.soclogin.debug
Create separate Facebook platform configurations for production and debug builds.
Step 4: Review and Publish your app
Follow the prompts in the Meta for Developers Dashboard to
- Complete Facebook's Business verification
- Complete the App Review Submission
- Complete all requirements and publish the app.
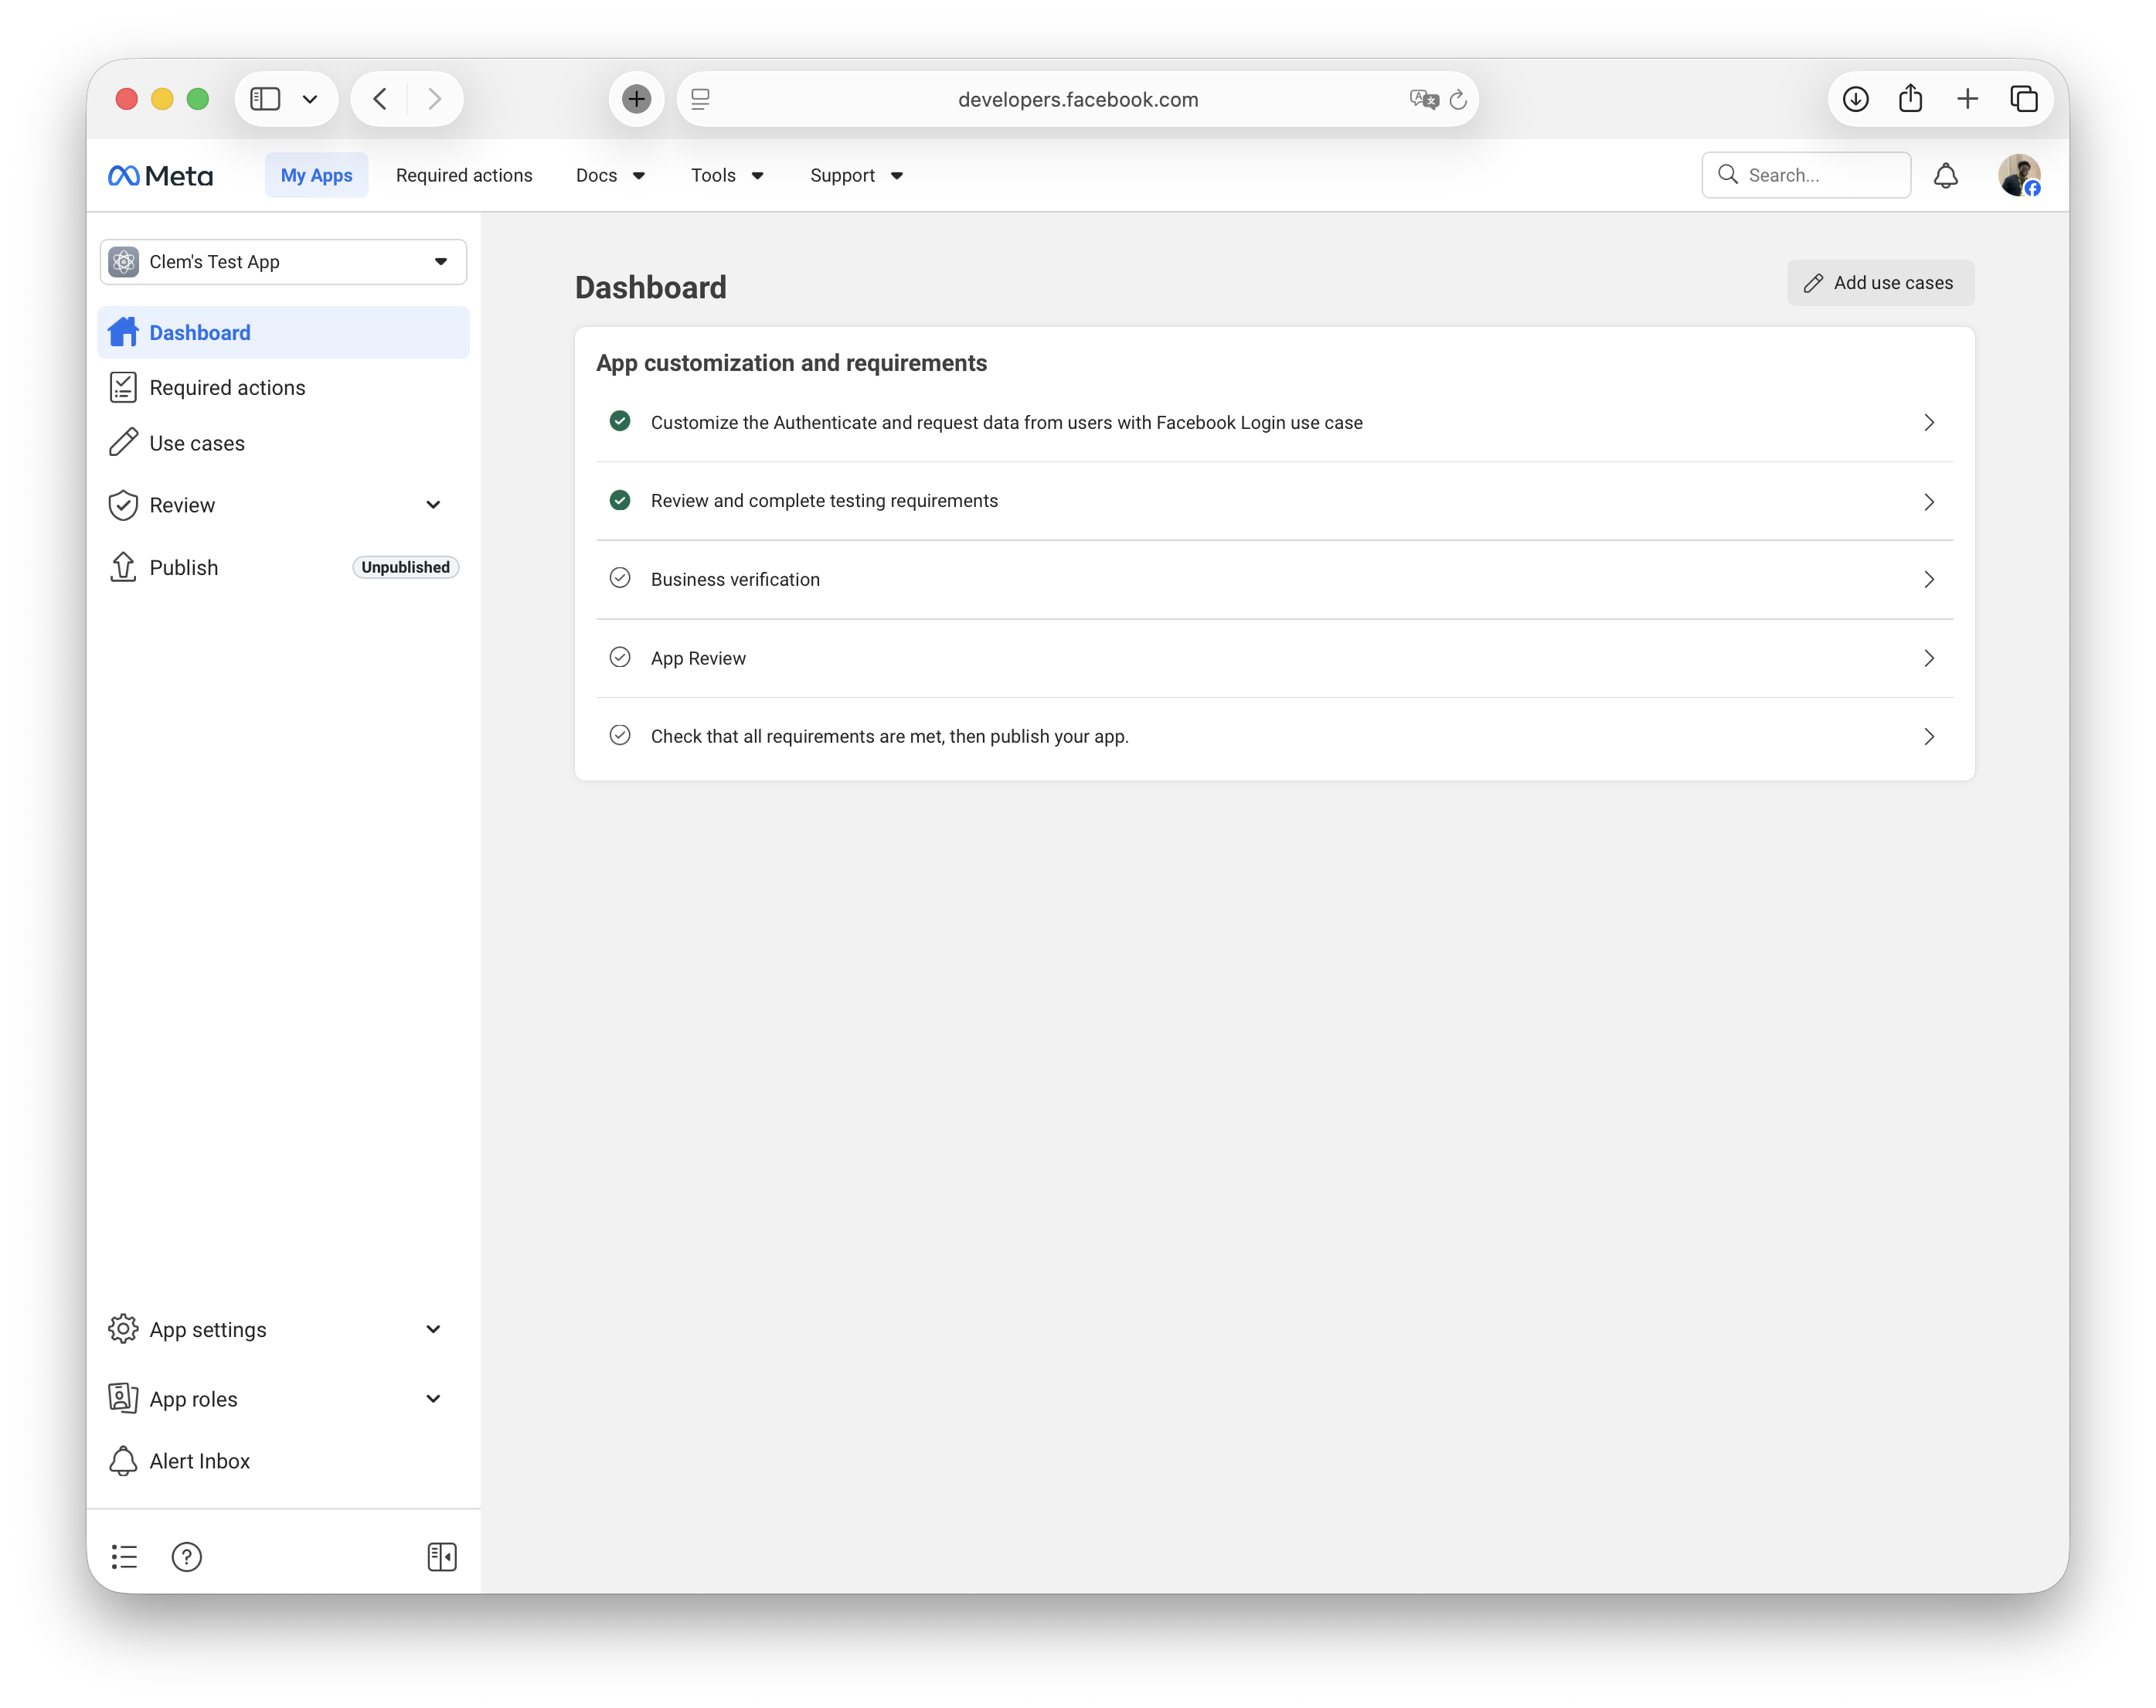
Meta for Developers Dashboard
Step 5: Add credentials to the Median App Studio
Now that your Facebook App is configured, add these credentials to the Median App Studio:
- Log in to the Median App Studio.
- Navigate to: Native Plugins → Social Login → Settings.
- Enter your Facebook Configuration:
| App Studio Field | Value from Facebook | Where You Found It |
|---|---|---|
| Application ID | Your App ID | Dashboard top-left (Step 1.2) |
| Client Token | Your Client Token | Settings → Advanced → Security (Step 2.3) |
| Display Name | Your App Display Name | Dashboard top-left (Step 1.2) |

Social Login - Plugin Configuration
- Click Confirm and Save.
- Rebuild your app for changes to take effect.
Step 6: Test your configuration
Before going live:
- Test login in your development app
- Verify token exchange works
- Test with multiple Facebook accounts
- Test on both iOS and Android devices
- Verify that the user profile data is returned correctly
Important notes
Facebook Limited Login (iOS)
On iOS, if users decline App Tracking Transparency (ATT) permission, Facebook automatically uses a "Limited Login" method.
Key differences with Limited Login:
- Returns a JWT token instead of an access token
- Graph API endpoints are unavailable
- Requires different token validation
App Tracking Transparency
App Tracking Transparency permission is required to use standard Facebook Login on iOS. If users decline ATT, Limited Login is used automatically.
Implementation:
- Request ATT permission in your app.
- If the user allows, the standard Facebook login opens.
- If the user declines, the limited login version opens automatically
You can also force limited login by setting the forceLimitedLogin: true in your JavaScript Bridge call.
Updated 2 months ago